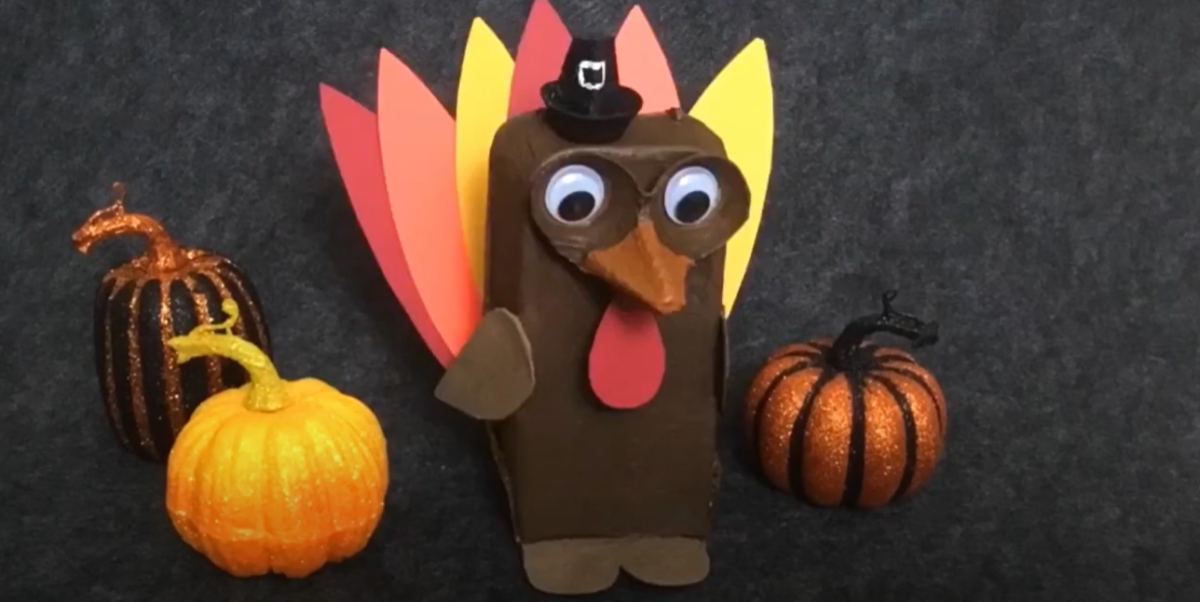
Easy Thanksgiving Craft for Kids: Egg Carton Turkey
Add to the fun and festivities of the day with a Thanksgiving craft that’s great for kids and parents to enjoy together! Engaging children in holiday-themed crafts not only sparks their imagination but can also create an opportunity for family bonding and learning.
This easy-to-make craft repurposes materials you likely already have at home, making it a budget- and eco-friendly project that can also highlight the value of recycling. This turkey’s egg-carton base provides a unique texture and shape that helps bring the turkey to life.
What You’ll Need To Make an Egg Carton Turkey
- An empty egg carton
- Paint (acrylic works best)
- Paint brush
- Glue
- Colored paper
- Scissors
- Googly eyes
Instructions for Making Your Egg Carton Turkey:

Step 1: Gather Your Materials
First, collect all of the materials listed above.
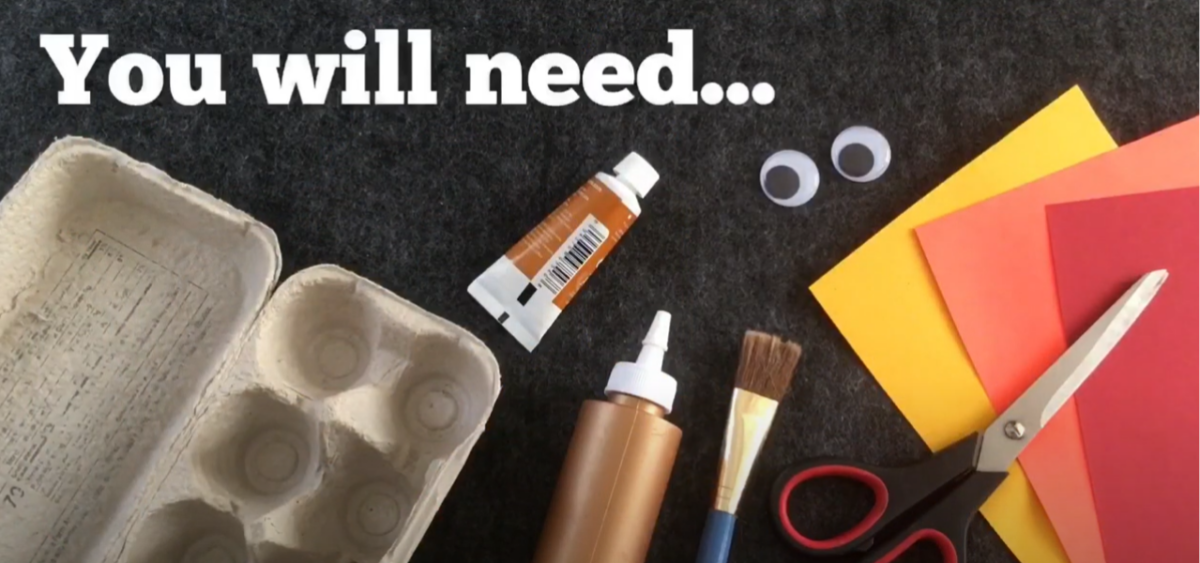
Construction Paper: Choose traditional Thanksgiving colors like red, orange, yellow, and brown. This will be used for the turkey’s feathers, beak, and other features.
Scissors: You’ll need a pair for cutting the egg carton and the construction paper. Note: Safety scissors are best for little hands.
Glue: Regular white school glue or a glue stick will work well for sticking on the turkey’s features.
Egg Carton: You will need both the top and bottom half of a standard cardboard egg carton.
Paint: Brown, red, yellow, and any other festive colors your child would like to use to decorate their turkey.
Paint brushes: These will be used to color the egg carton. Having a few sizes can be helpful for different detail work.
Googly Eyes: To bring your turkey’s face to life with a bit of whimsy.
Step 2: Cut the Egg Carton
Next, it’s time to cut the egg carton into the pieces you will need.
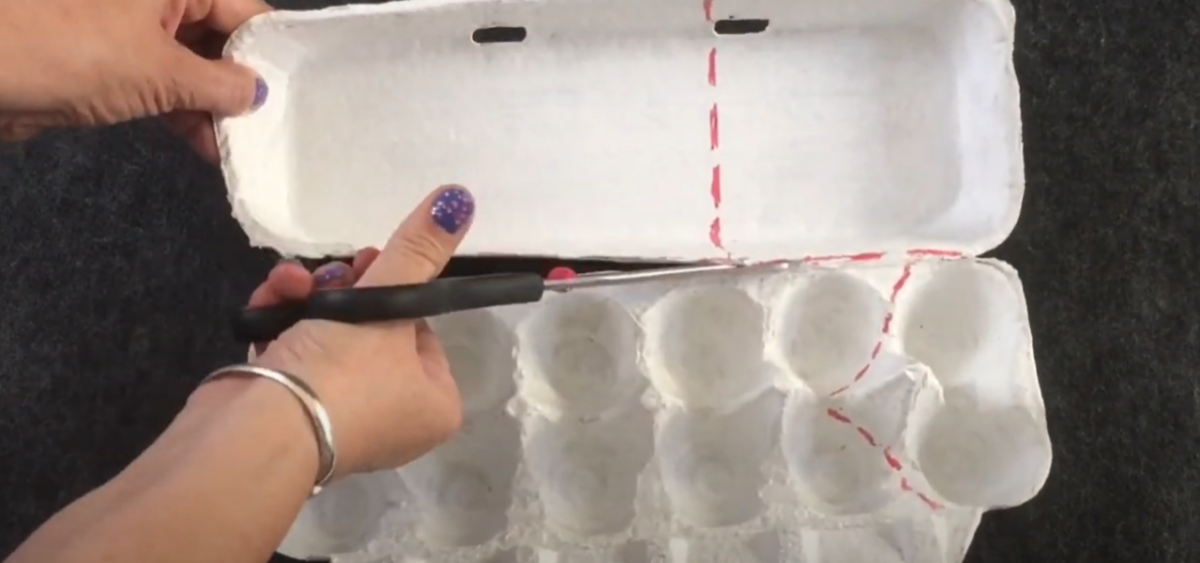
Separate the top and bottom by cutting down the middle.
Then, cut the top part of the carton about 3/4 of the way down.
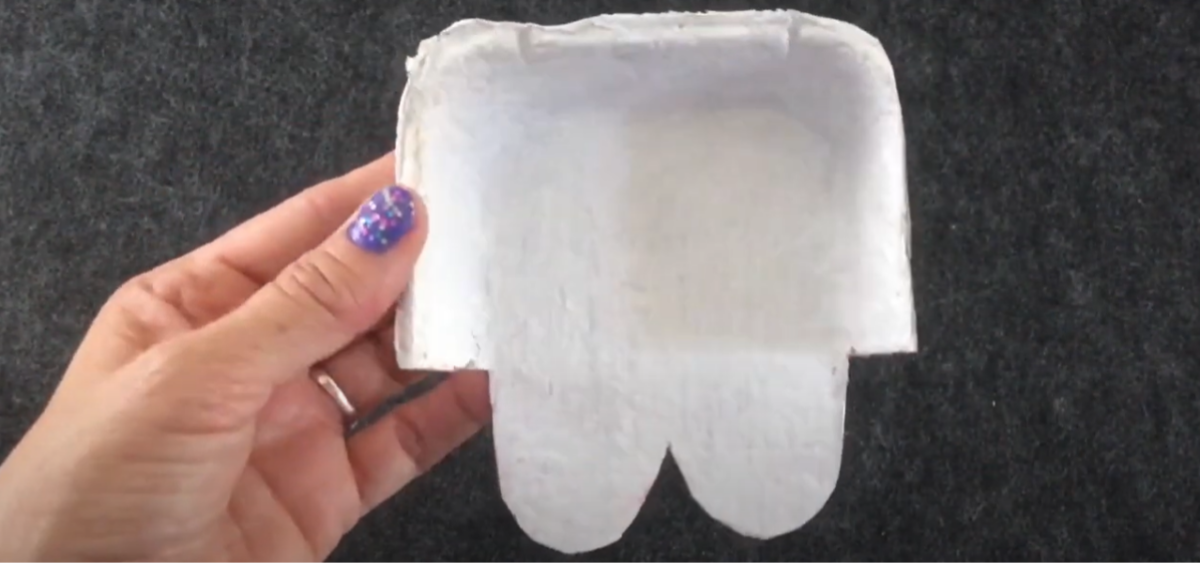
Cut the smaller part of the top piece so it has two round humps on one side.
Cut a small portion of the bottom part of the carton to form your turkey’s face, as shown in the picture.
Step 3: Glue the Pieces Together
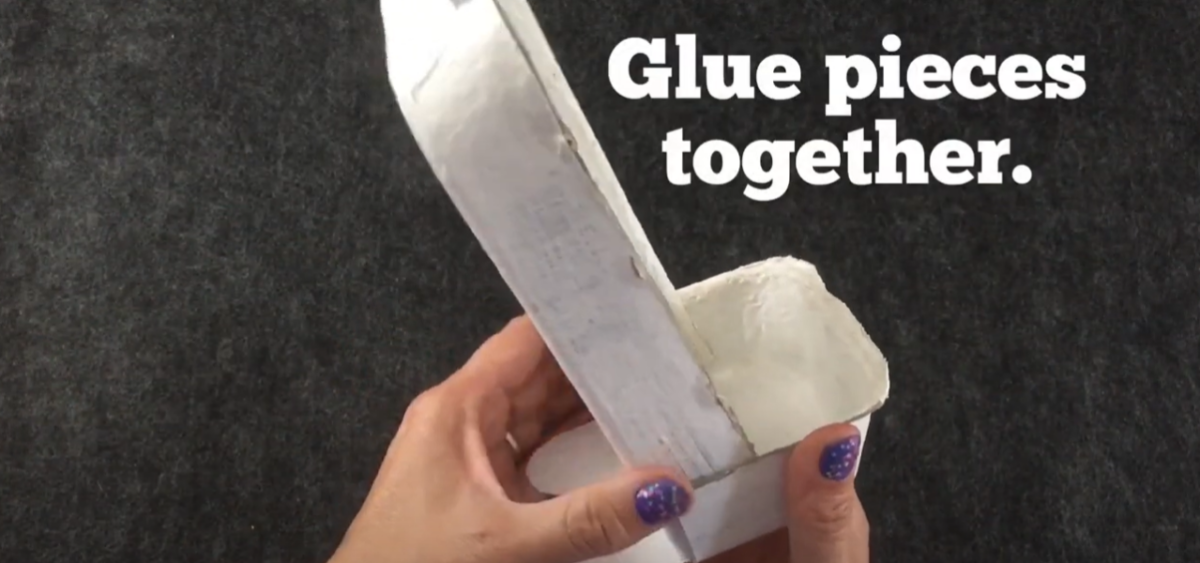
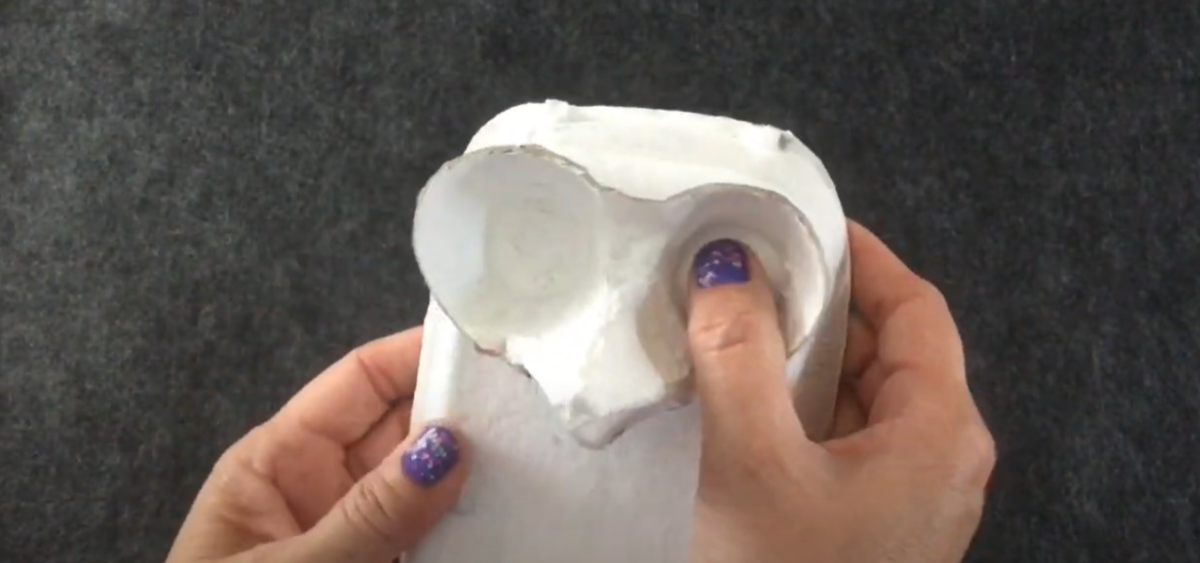
You should have three pieces in total.
Start by gluing the pieces you made with the top of your egg carton. Place the longer top part of the carton into the shorter one with the two humps. Glue it so it’s standing horizontal.
Next, glue the face of your turkey near the top of the outside-facing side of the longer part of your carton.
Step 4: Cut and Glue Feathers
While your glue is drying, you can cut colorful feathers out of your construction paper.
Once you have 3-6 feathers, you can start gluing them to the inside of the shorter part of the top piece.
Tip: Be sure to watch the video tutorial to catch all the details of each step.
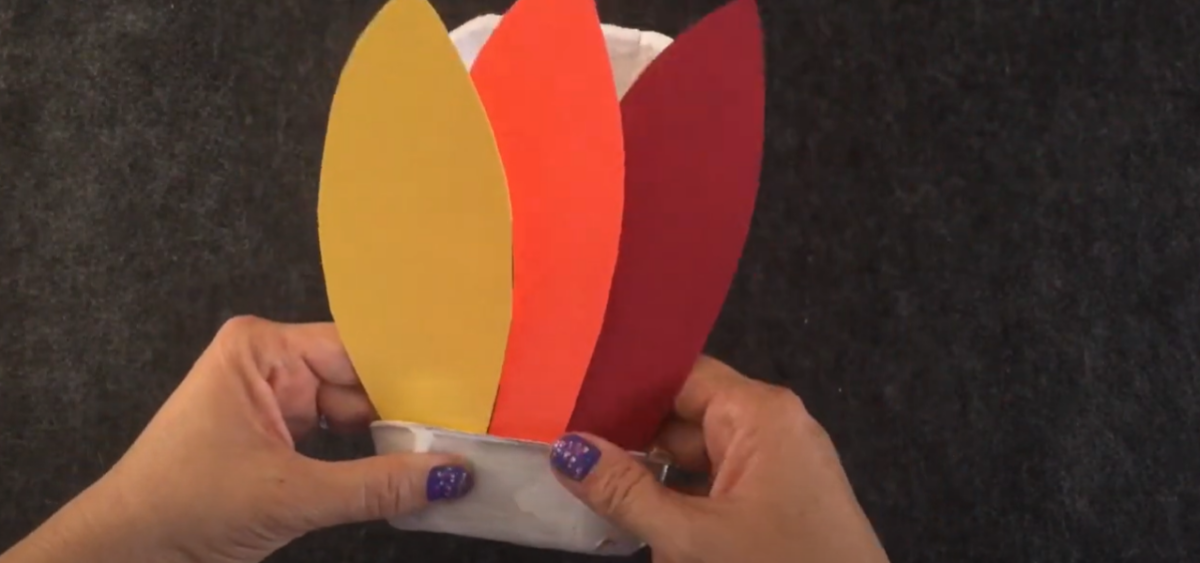
Step 5: Paint the Turkey and Add Eyes
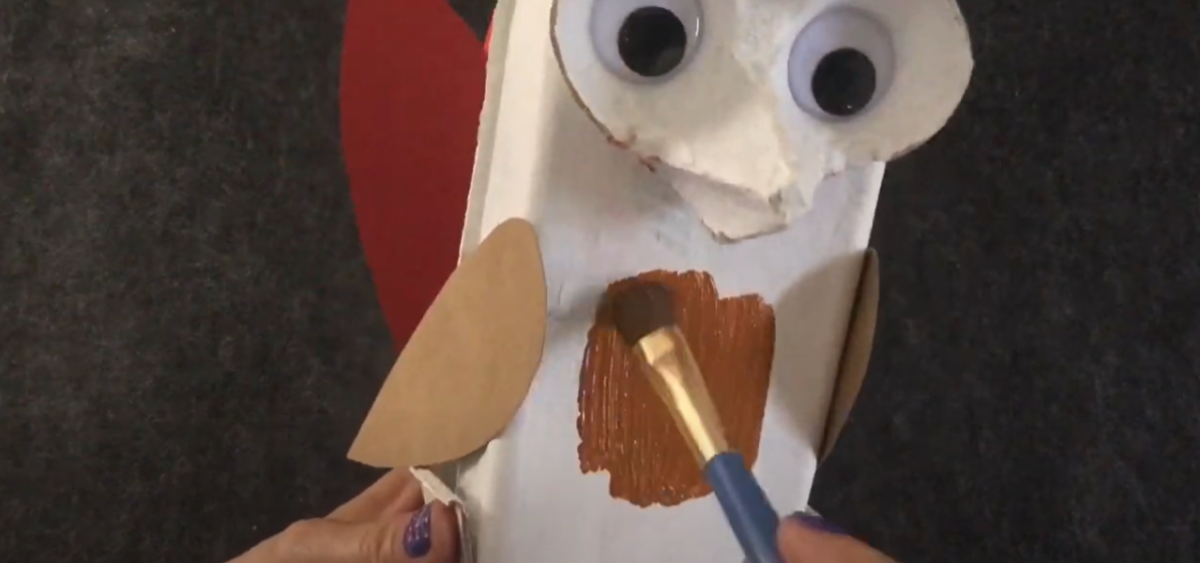
Next, glue on your googly eyes and paint your turkey.
Paint the body one color and use orange to paint the beak to help it stand out.
Feel free to add more details, like paper wings and feet, to help your turkey come to life!
Step 6: Use Your Finished Turkey to Decorate
Enjoy your finished turkey. You can make a whole flock and use them as center pieces for your holiday tables!
