Itsy Bitsy Spider (Fun Halloween Craft for Kids)
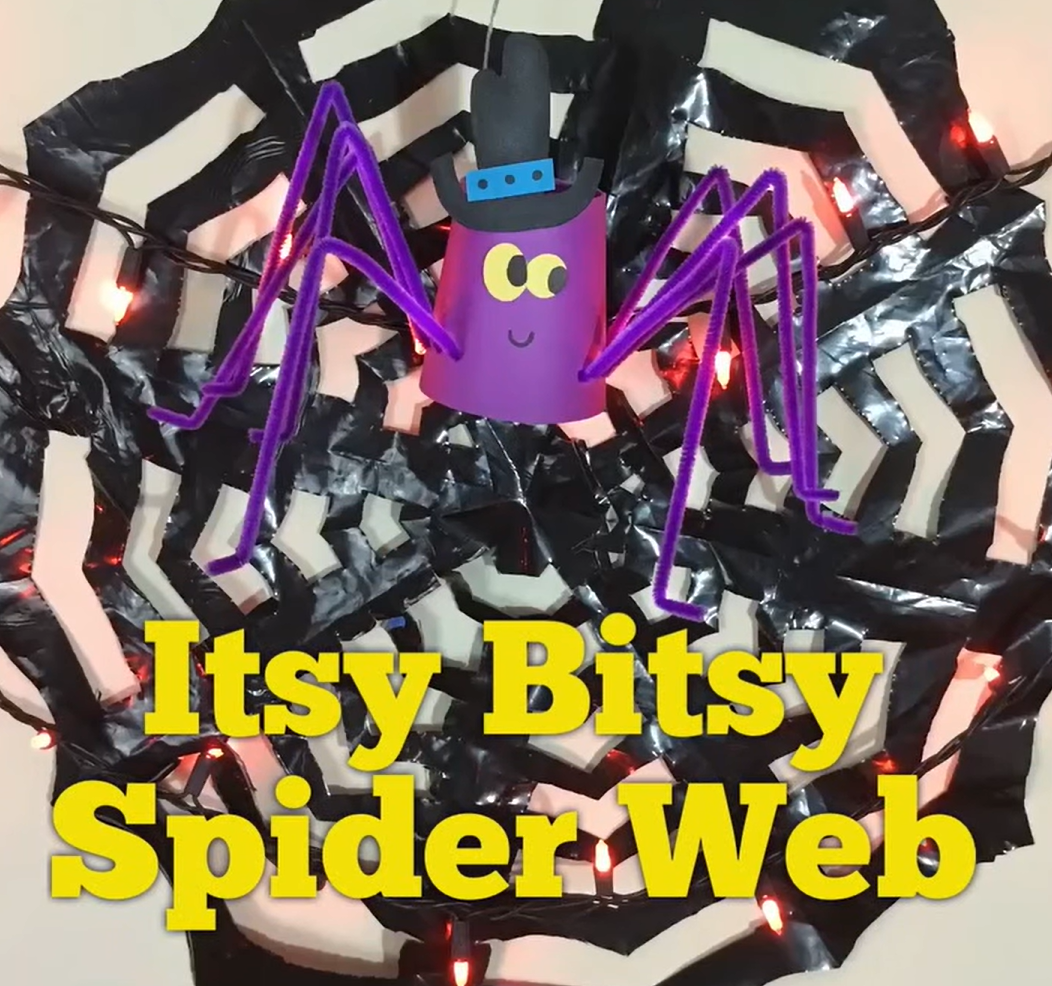
The Itsy Bitsy Spider is a classic rhyme that children love, and now you can bring it to life with this fun Halloween craft! This activity is perfect for kids of all ages and adds a playful touch to your Halloween decor. Plus, it’s a great way to engage children in a hands-on project that fosters creativity and fine motor skills. Get ready to spin some webs and create your very own creepy-crawly spider! To see a video of this craft in action, check it out on Facebook here.
What You’ll Need for the Itsy Bitsy Spider Activity:
- Trash Bag: To create the spider’s web.
- Cup: Forms the body of the spider.
- Pipe Cleaners: For the spider’s legs.
- Markers: To decorate the spider and web.
- Construction Paper: To add extra details to the spider.
- Tape: To secure various parts of the craft.
- String: To hang the spider from its web.
- Scissors: Sharp enough to cut through a garbage bag (adult supervision may be needed).
Instructions for Making Your Halloween Itsy Bitsy Spider Activity
Step 1: Gather your supplies.
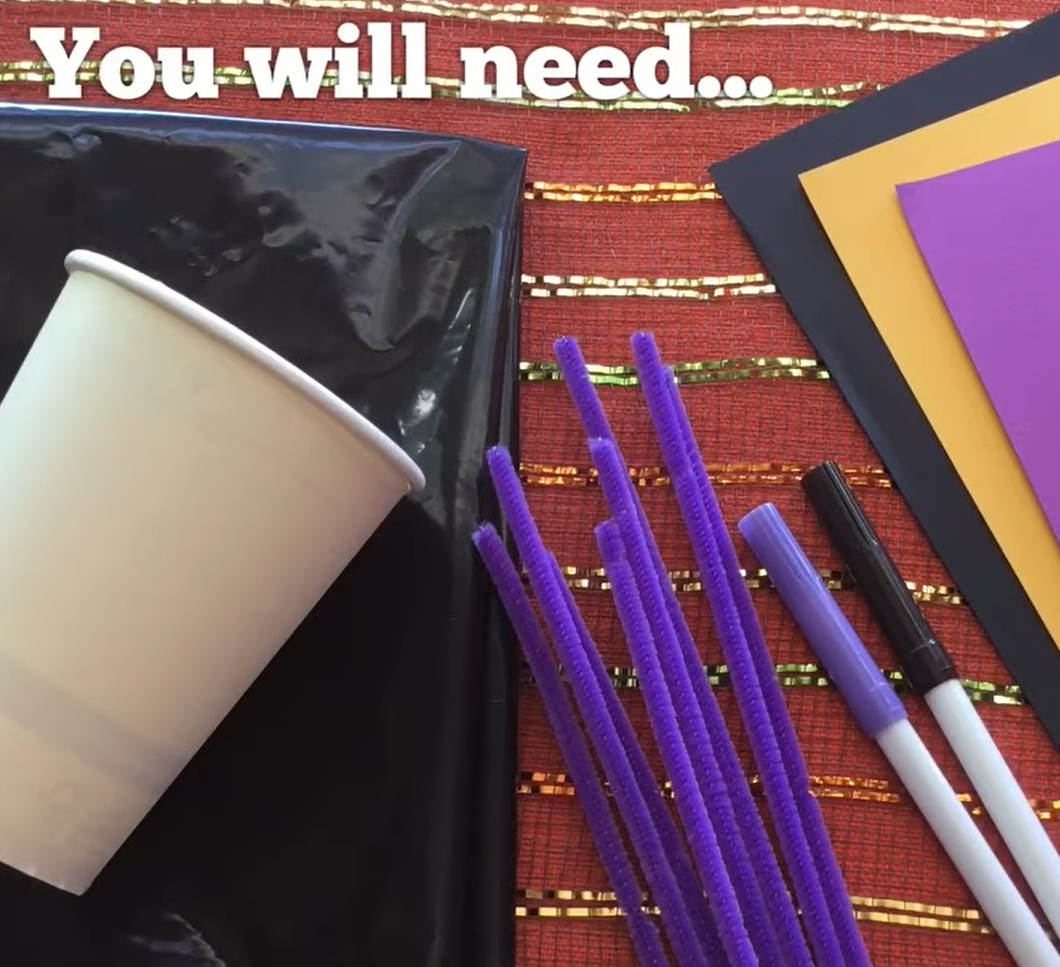
Start by gathering all of your materials. This includes a trash bag, cup (plastic or paper), pipe cleaners, markers, construction paper, tape, and string. Having everything ready will make the crafting process smoother and more enjoyable.
Step 2: Start with the spider web.
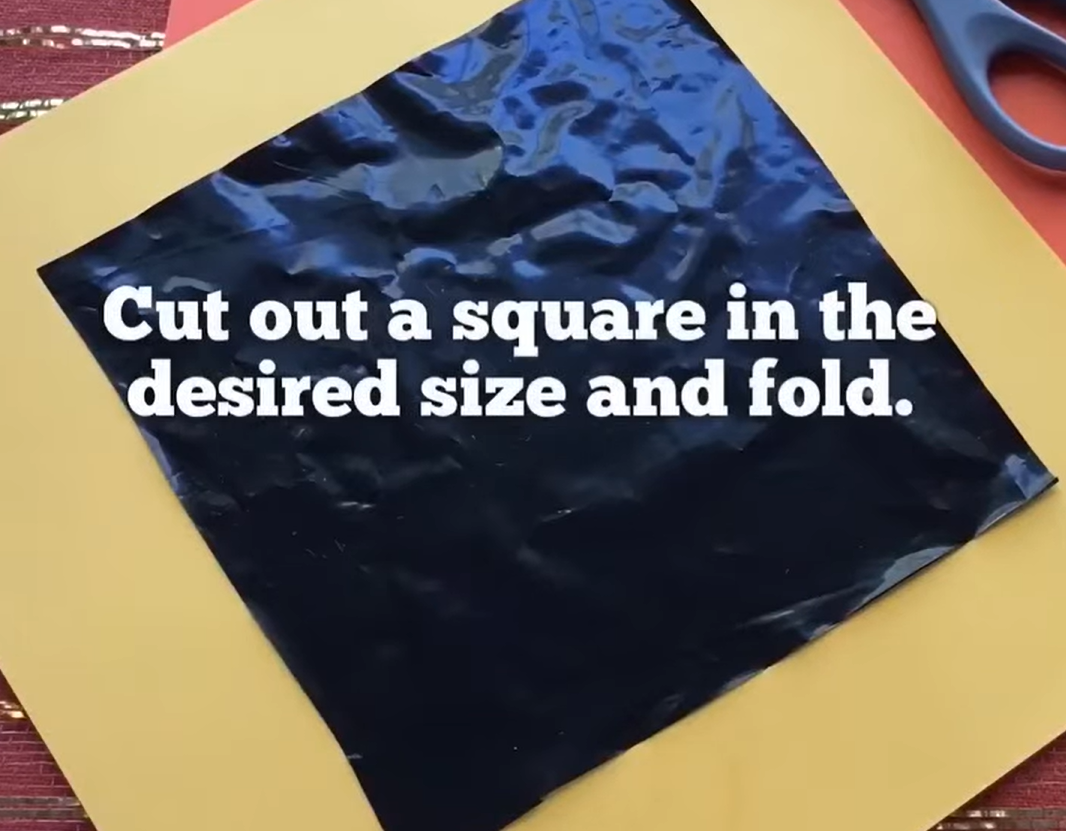
Begin by creating the spider’s web. Lay out your trash bag and cut out a square in the size you want your web to be. Then, fold the square in half, and continue folding it multiple times until it’s a small triangle or a manageable size for cutting.
Step 3: Tape and cut your web.
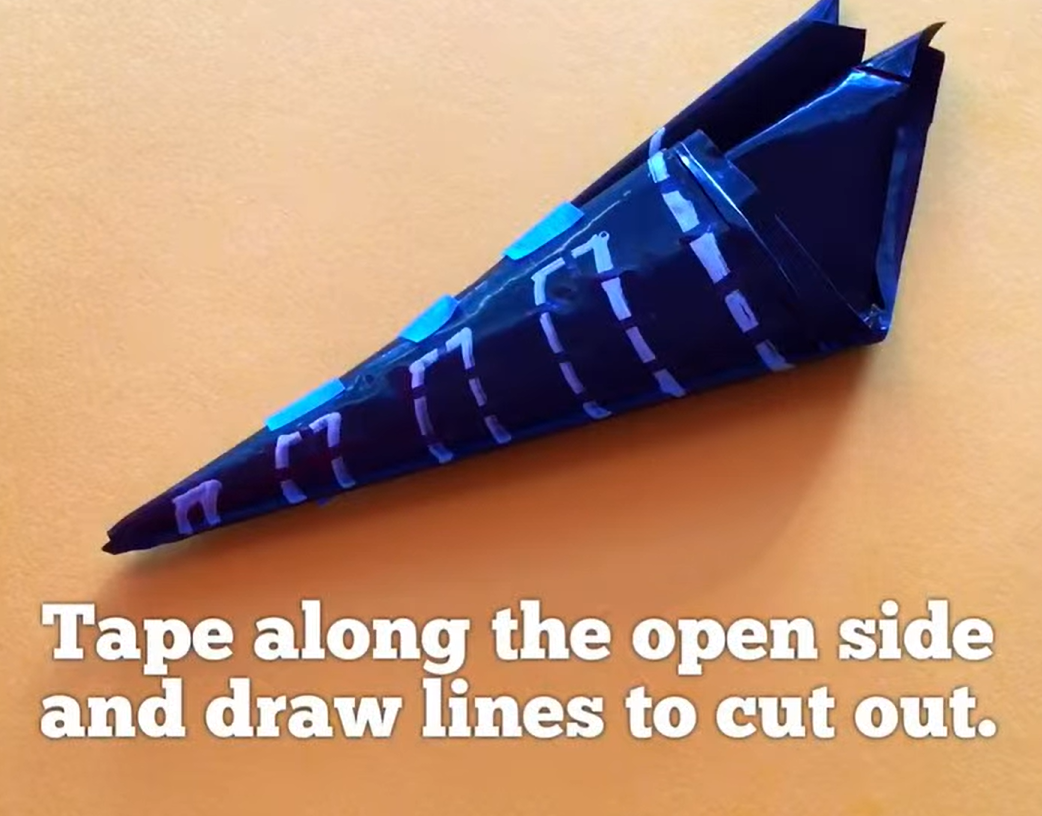
Once folded, tape the edges of the open sides to keep them together. Using a silver marker, draw lines along the bag to outline where you’ll cut, just like when making a paper snowflake.
Be sure to cut small slits and shapes along the folded edges to create the web’s pattern. The cuts should be spaced out to leave enough plastic intact so that the web is still sturdy.
Step 4: Unfold your web.
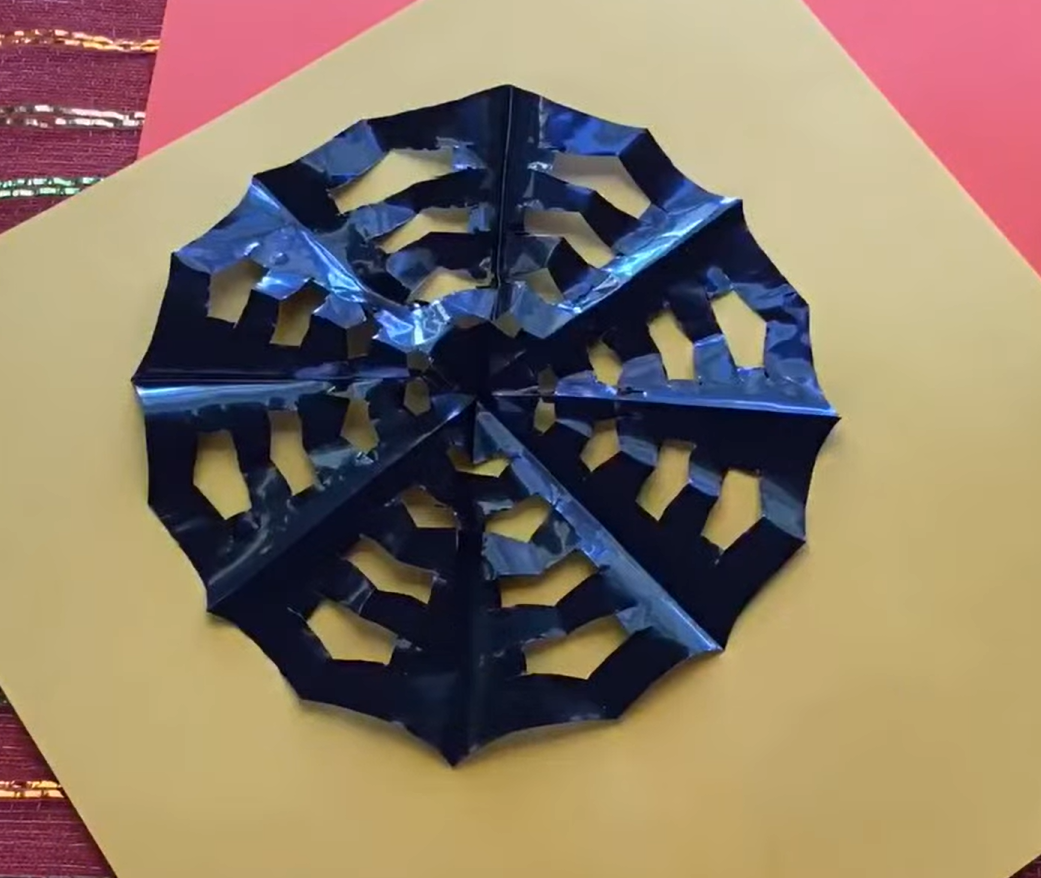
Carefully unfold your web to reveal the design you’ve created. You should now have a spider web pattern! This web can be taped to a wall, window, or any other surface. It will be the backdrop for your Itsy Bitsy Spider to crawl on.
Step 5: Time to make the spider!
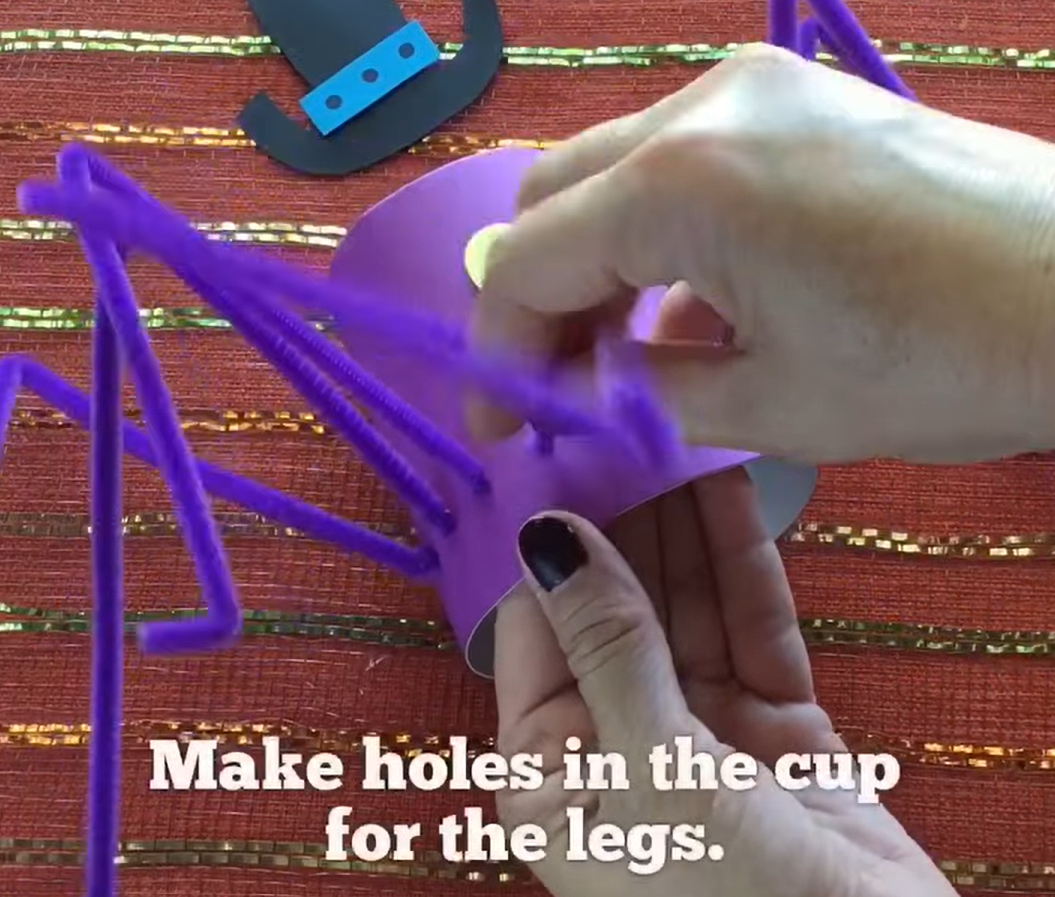
Now it’s time to craft your spider. Take your cup and decide if you want to leave it plain, color it with markers, or wrap it in construction paper.
Once the cup is decorated, make holes around the bottom edge for the legs—four on each side. Thread the pipe cleaners through these holes, then bend them to form the spider’s legs. Make sure to position the legs so that your spider can stand or hang nicely.
Step 6: Add fun features to your spider.
Personalize your spider by adding features like eyes, a mouth, or fangs. You can cut out shapes from construction paper and glue them onto the cup.
Once decorated, poke a small hole in the top of the cup and thread a piece of string through it. This string will allow your spider to hang from the web or dangle in the air.
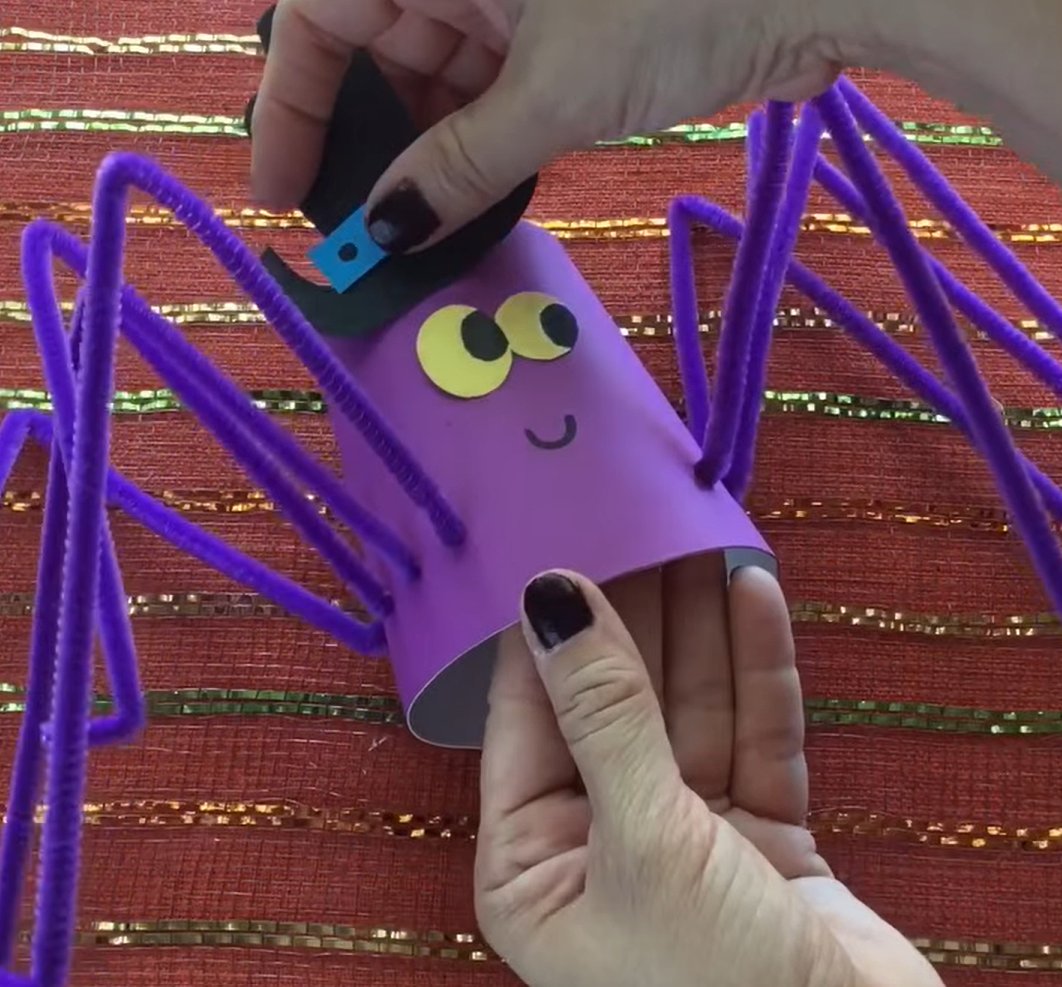
Step 7: Put it all together.
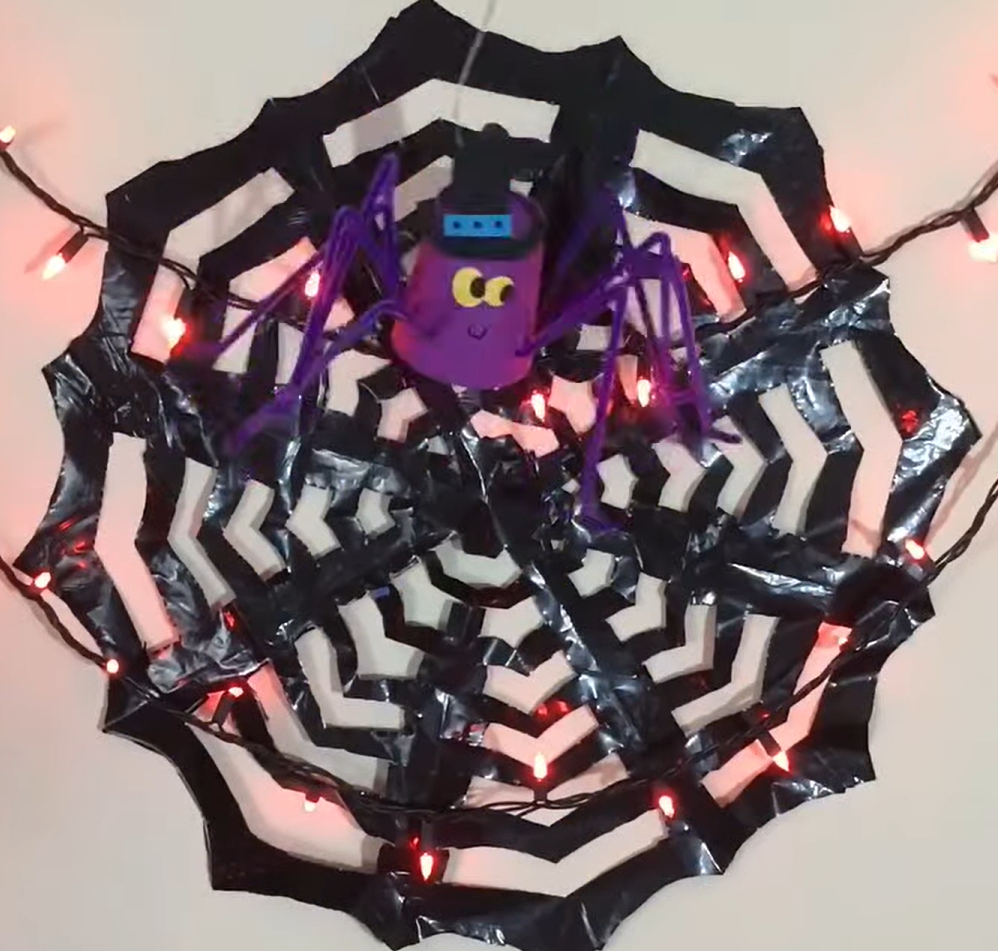
With your web and spider complete, it’s time to assemble the scene. Hang your web on a wall or other surface, and then use the string to attach your spider to the web. Now you have a spooky Itsy Bitsy Spider ready to entertain and delight! You can even add fun Halloween lights for an extra special touch!
⭐ Rhyme Time: While crafting your spider and web, have fun reciting the Itsy Bitsy Spider rhyme together and watching this playful ABCmouse video! This adds an extra layer of enjoyment and interaction, making the activity even more memorable for you and your little ones. Encourage them to act out the spider’s journey with their new creation, bringing the beloved story to life in a whole new way.
The itsy bitsy spider climbed up the water spout.
Down came the rain and washed the spider out.
Out came the sun and dried up all the rain.
And the itsy bitsy spider climbed up the spout again.
Safety Tips for Crafting with Young Children
When crafting with young children, always supervise them, especially when using scissors, tape, or small items that could pose a choking hazard. Consider using child-safe scissors to reduce the chances of anyone accidentally getting cut.
Try More Fun Halloween Games and Activities

Keep kids entertained this Halloween with spooky crafts, snacks, and free printables! Make balloon bats, yarn pumpkins, and tasty treats, or play Halloween bingo. Download coloring pages, word lists, and more for extra festive fun.
