Letter K Crafts & Activities for Preschoolers
Share
Kick start letter learning with hands-on crafts and activities dedicated to the letter K.
Table of Contents
Keep kids engaged with learning the letters of the alphabet with these letter K crafts and activities. Each idea uses basic art supplies and is designed for young learners to complete with adult supervision.
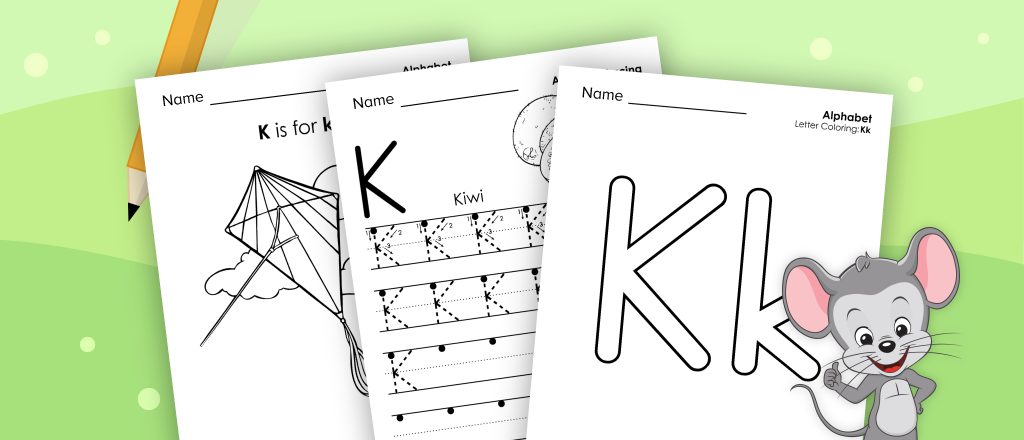
Some of these letter K crafts and activities require the outline of a letter K. You can draw one yourself or find one in our free printable collection of letter K worksheets.
1. K is for King
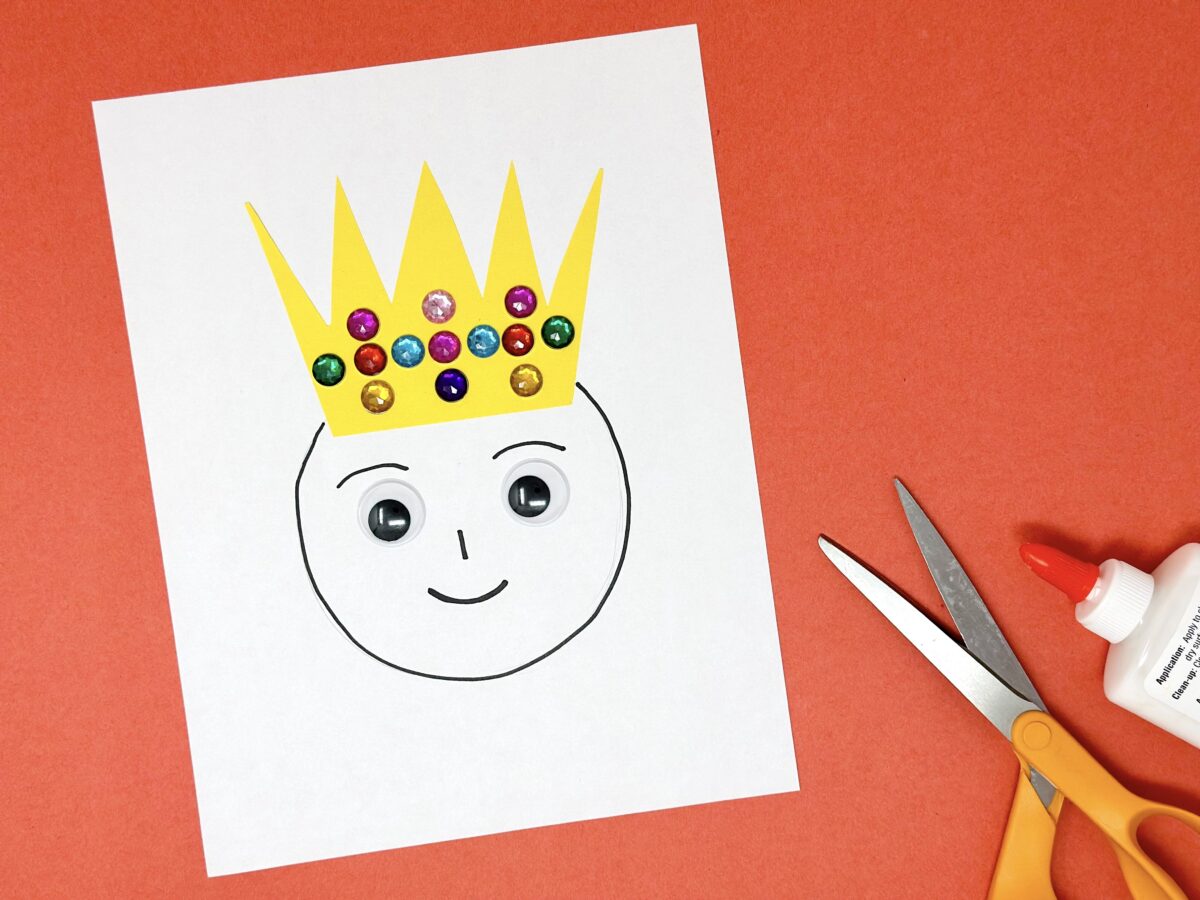
Kids will get a kick out of turning a simple face into an expressive king with a crown!
Required Materials
- white and yellow paper
- scissors
- marker
- plastic gems
- googly eyes
- liquid school glue
How To
Have your child draw a circle onto a white sheet of paper, and then glue on the googly eyes and draw on other features to help create a fun expression on the king’s face.
Next, work with your child to cut out a crown shape from the yellow paper. Glue on plastic gems and add stickers, glitter, or any other decorations you’d like. Then glue the crown onto the king’s head.
2. Letter K Kite Activity
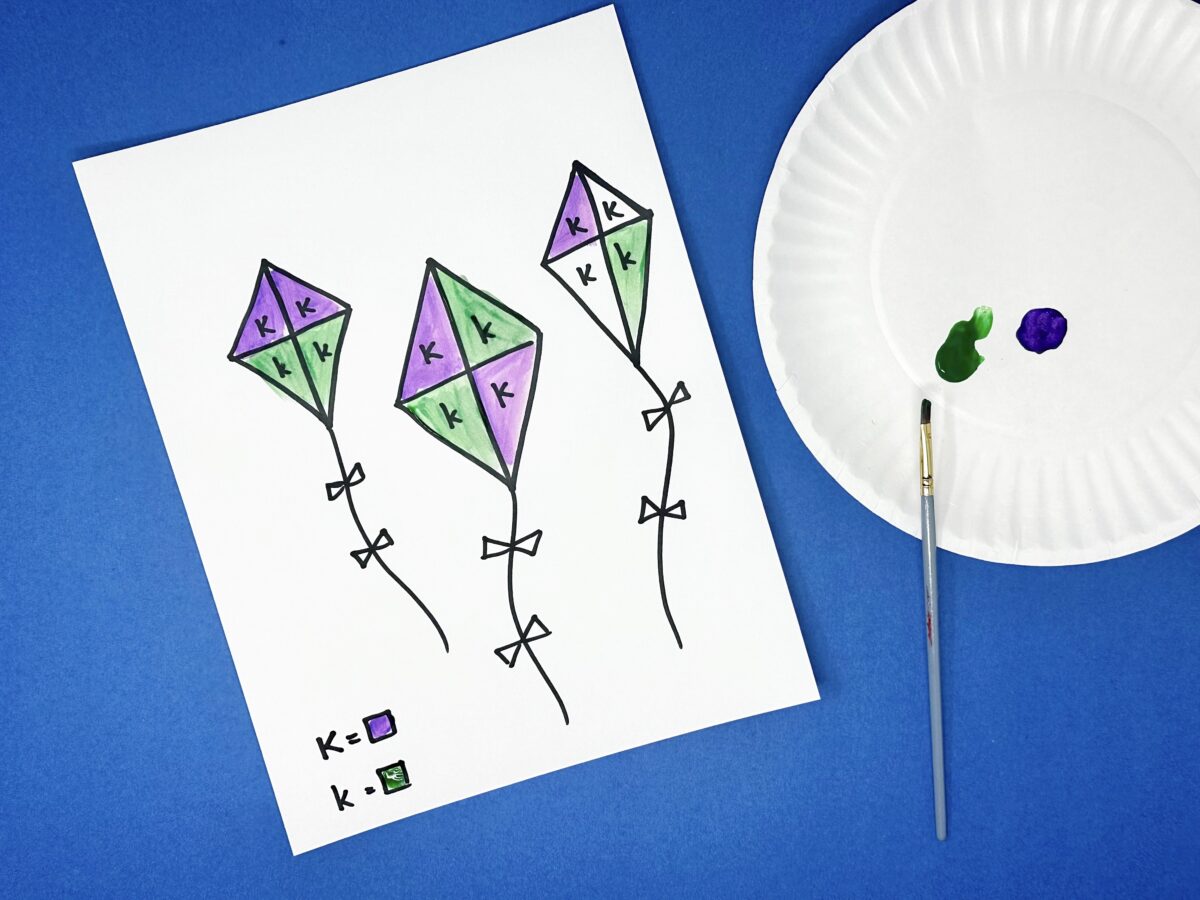
Keep the letter K fun going while helping children learn the subtle difference between an uppercase and lowercase K.
Required Materials
- white paper
- black marker
- two paint colors
- paint tray or paper plate
- paint brush
How To
Draw kites onto a sheet of paper by drawing a diamond shape. Then draw lines going across the kite in both directions. Write the letter K in each section of the kite, making on set of Ks larger to represent uppercase Ks and another set smaller to represent lowercase Ks.
Have your child paint uppercase letter Ks one color, and lowercase Ks the other color.
Tip: If it’s too tricky to differentiate the size of your Ks, just focus on having your child enjoy painting over the letter Ks instead.
3. Letter K Plastic Wrap Painting
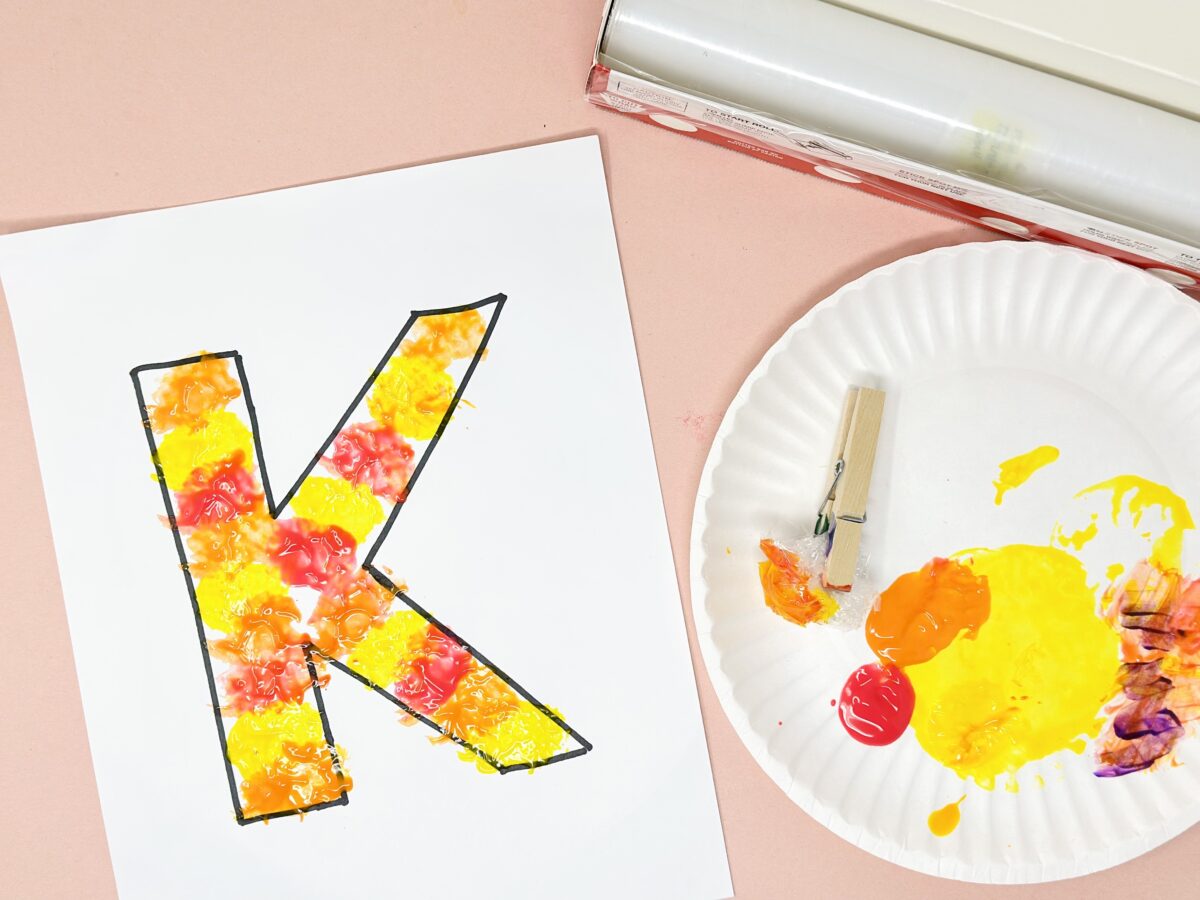
Who knew plastic wrap could help turn the letter K into a kaleidoscope of colors?!
Required Materials
- paper
- plastic wrap
- clothespin
- paint
- paper plate
How To
Print or draw out the outline of a letter K onto a sheet of paper. Tear off a small section of plastic wrap and ask your child to scrunch it up into a small ball and pinch a clothespin onto it. Next, have them select a few different paint colors and add those to a paper plate.
Have your child hold the clothespin and dip the plastic wrap into a bit of paint and then blot the paint into the letter K. Repeat the process until the letter K is filled, letting your child experiment with mixing colors as they work.
4. K is for Kangaroo
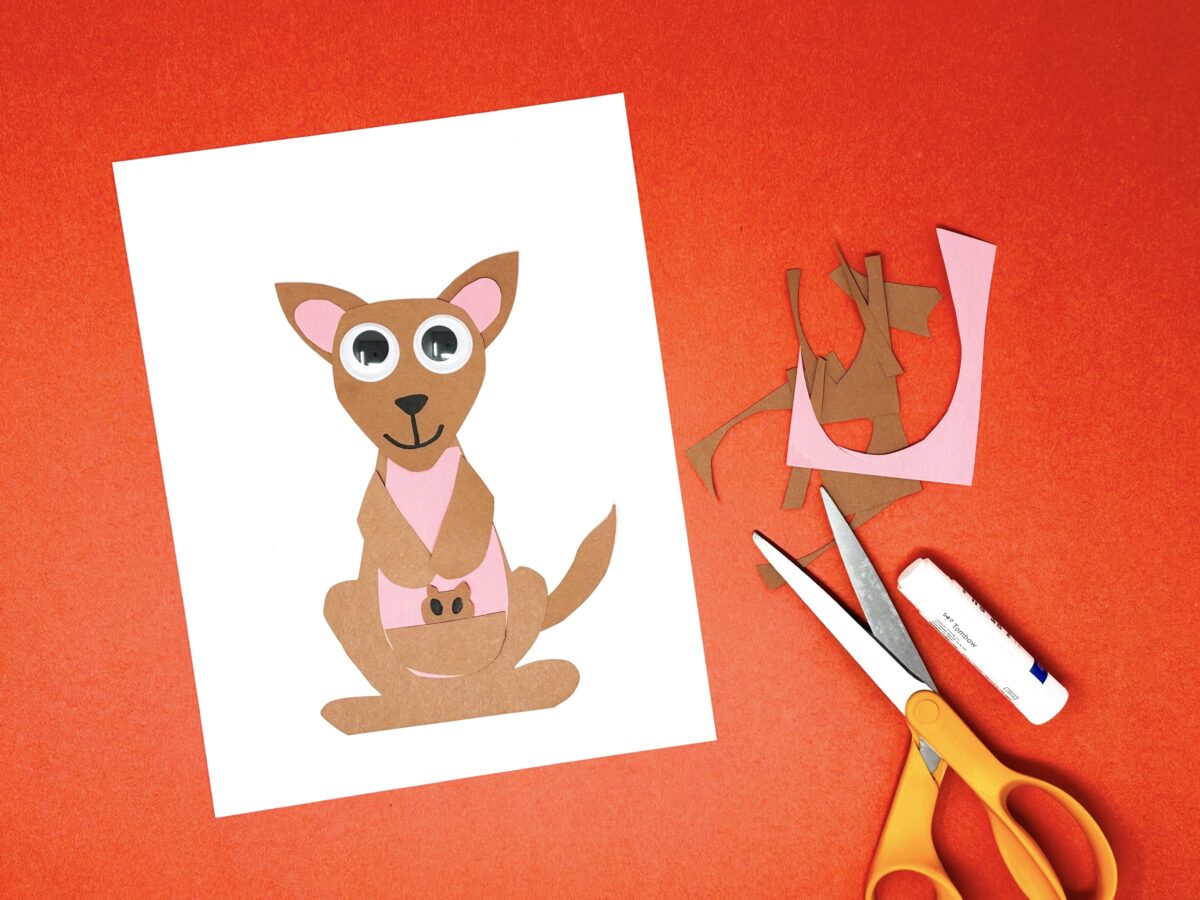
This cute kangroo even includes a baby that children can pull in and out of a pouch.
Required Materials
- brown and pink construction paper
- scissors
- glue
- googly eyes
- marker
How To
Begin by cutting out the shapes you’ll need for the kangaroo with the brown construction paper: A longer oval for the body, a triangular-shaped circle for the head, two longer semi circles for the arms, two small semi circles for ears, a longer pointed shape for the tail, a semi circle for the pouch, and one more piece trimmed into the shape of legs. You’ll also need to cut a small oval kangaroo baby from the brown paper. Use the pink paper to cut out another body shape and two smaller semi-circles for the inside of the kangaroo’s ears.
Work with your child to “build” the kangaroo, laying out and gluing down all of the brown body pieces except for the kangaroo’s arms and pouch. Draw on a face for the mama kangaroo as well as the baby kangaroo.
Next, glue down the pink body piece and pink ear sections, then top the pink body piece with the kangaroo’s arms and pouch. When gluing down the pouch, only glue down the lower edge so your child can pull the baby kangaroo in and out of the pouch. Once the kangaroo has dried, invite your child to pull the baby in and out of the mama’s pouch.
Tip: Simplify this craft by drawing the kangaroo and only cutting out paper for the pouch and baby.
5. Letter K Building
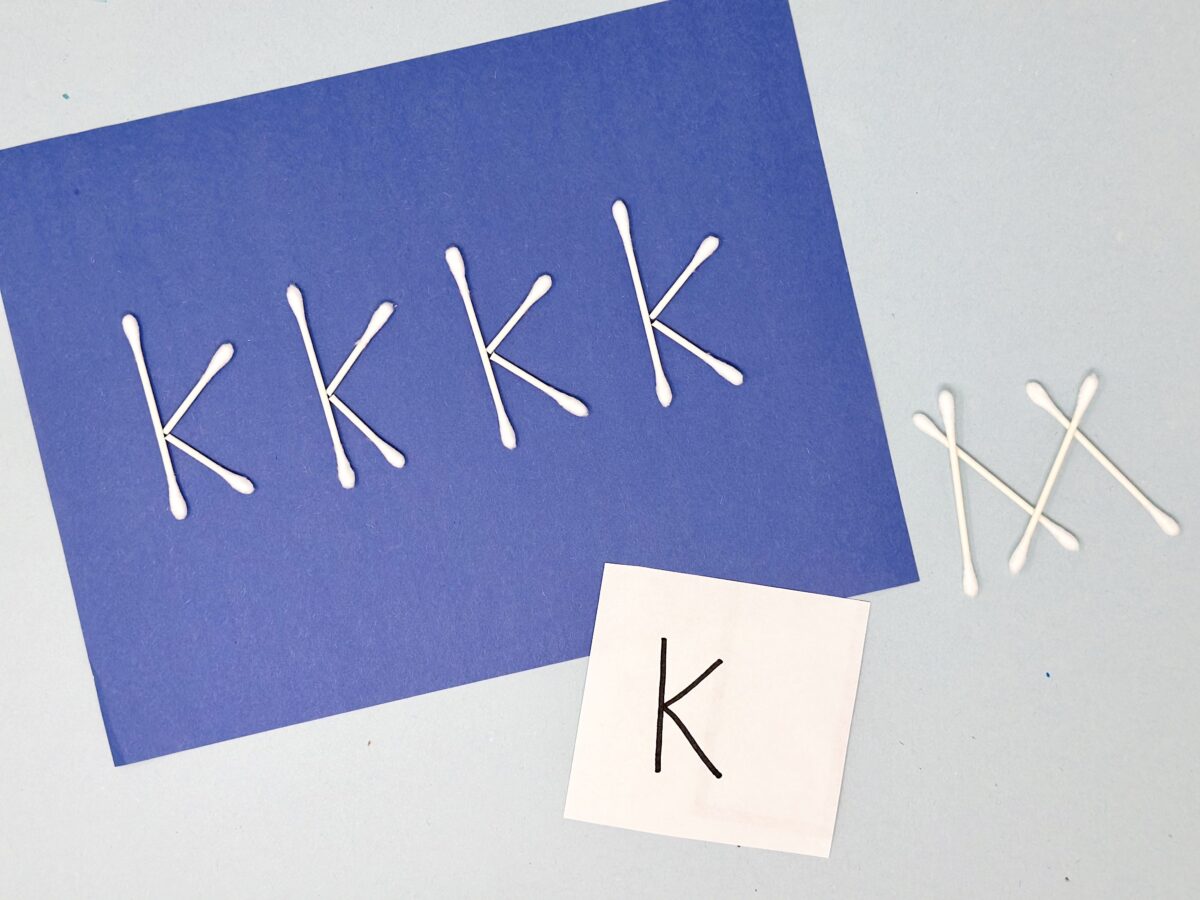
Cotton swabs make great building tools for a more tactile way of creating the letter K.
Required Materials
- cotton swabs
- colored construction paper
- scissors
How To
For this easy activity, grab a few cotton swabs and a piece of construction paper. Snip a few of the cotton swabs in half, and then explain to your child that they’ll be using them to build the letter K.
If your child needs some guidance, write a letter K for them to mirror as they work. When they finish creating their letter Ks, work with them to write a list of all the letter K words they can think of.
#1 Downloaded Kids’ Education App in the U.S.
The ABCmouse app has so much to offer! You and your child will find 10,000+ games and activities designed by curriculum experts to nurture math and reading skills, along with an extensive digital library and so much more. Our research-back curriculum focuses on preschoolers through second graders.
Then just $14.99 a month until canceled
6. Letter K Knife Painting
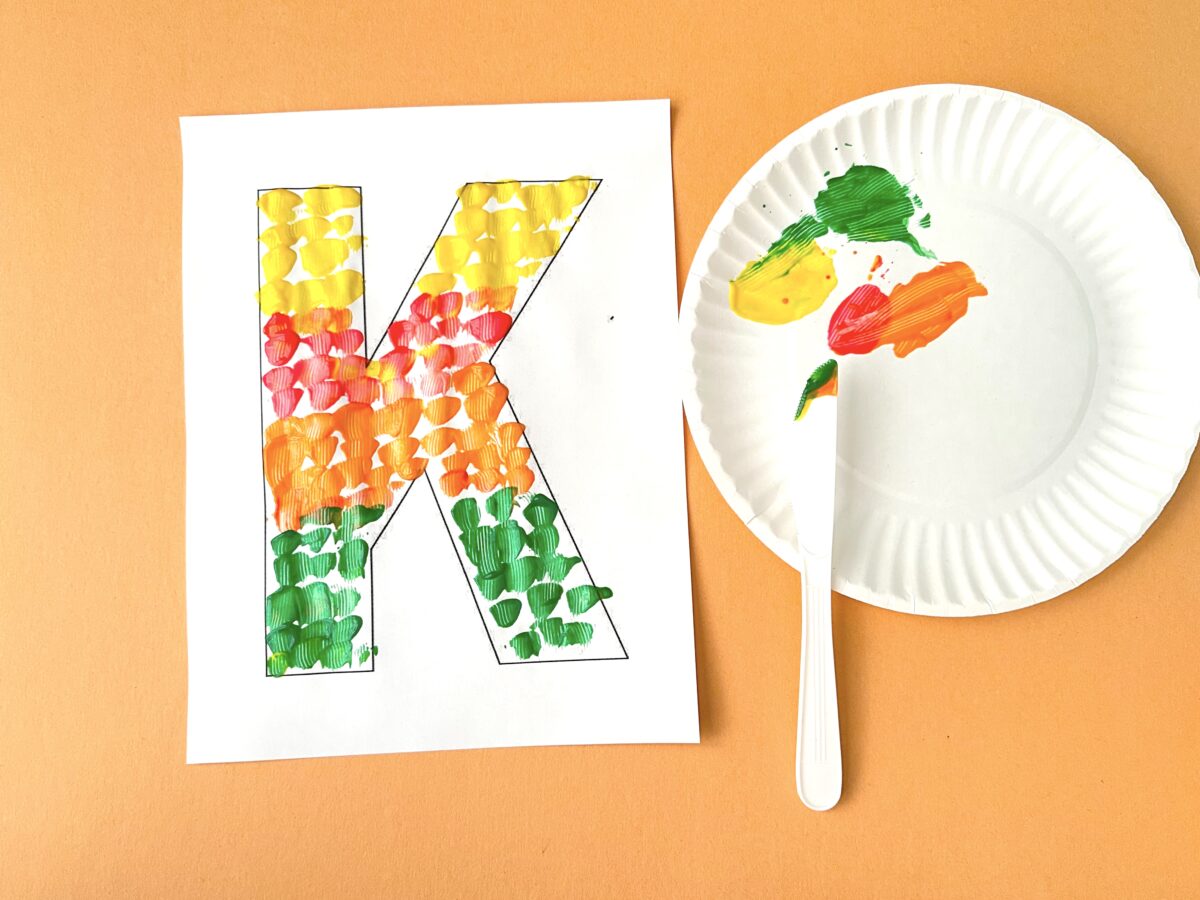
A plastic knife makes a unique painting tool in this letter K craft.
Required Materials
- paper
- plastic knife
- paint
- paper plate
How To
Print or draw out the outline of a letter K onto a white sheet of paper. Have your child pick a few colors of paint to work with and squirt those colors onto a paper plate. Then explain to your child that they’ll be using a plastic knife as a painting tool.
Have your child dip the tip of the plastic knife into a bit of paint and then gently tap or spread the paint inside their letter K. Repeat the process until the K is filled in, mixing paint colors and trying different techniques with the plastic knife as you go.
Tip: This letter K craft explores the silent letter K sound, which can be a tricky concept for young learners. Get some extra help with these Silent Letters Worksheets or simply enjoy this fun art technique while focusing on teaching the letter K shape rather than it’s silent sound.
7. K is for Koala
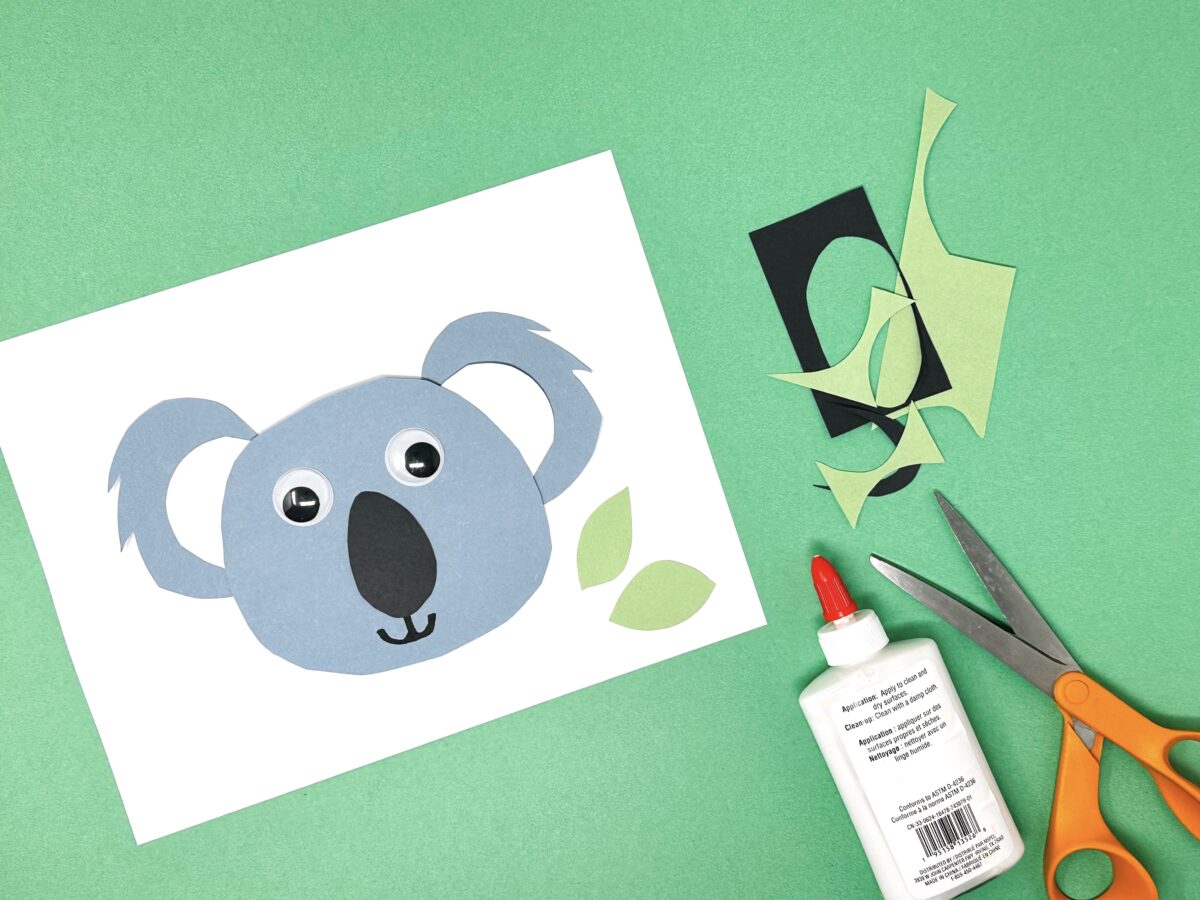
Cute and cuddly koalas are fun to make just by snipping out just a few circular shapes.
Required Materials
- gray, white, and black construction paper
- scissors
- googly eyes
- marker
How To
Use your scissors to cut out three circles from the gray construction paper, creating one large circle and two smaller circles. If you’d like to add a “furry” look to the koala’s ears, trim a few points into the edges. Next, cut out two white semi-circles for the koala’s inner ears and a black oval for the koala’s nose. Work with your child to assemble the white and gray pieces to create the koala’s face.
Once the koala’s face is assembled, glue on the googly eyes and the koala’s nose. Then, draw on a cute little mouth. If you’d like, snip out a few leave from green construction paper or simply draw them on.
8. Letter K Color Match

This letter K craft invites children to play with playdough and practice their color recognition skills, too.
Required Materials
- letter K outline
- colored playdough
- colored markers
How To
Print or draw out the outline of a letter K onto a piece of paper. Gather up a few colors of playdough and find markers that match the playdough colors. Use the colored markers to fill the letter K with circles in various colors.
Explain to your child that they’ll be matching the playdough to the colors they see inside the letter K. They can roll the playdough into balls and then flatten them slightly to fit the circles inside the letter K. As they work, discuss what color they’re using and count up how many times they see certain colors inside of their letter K.
Tip: Make this craft easier by simply inviting your child to fill the letter K with circles of playdough rather than matching the playdough colors to colors within the K.
9. K is for Kick
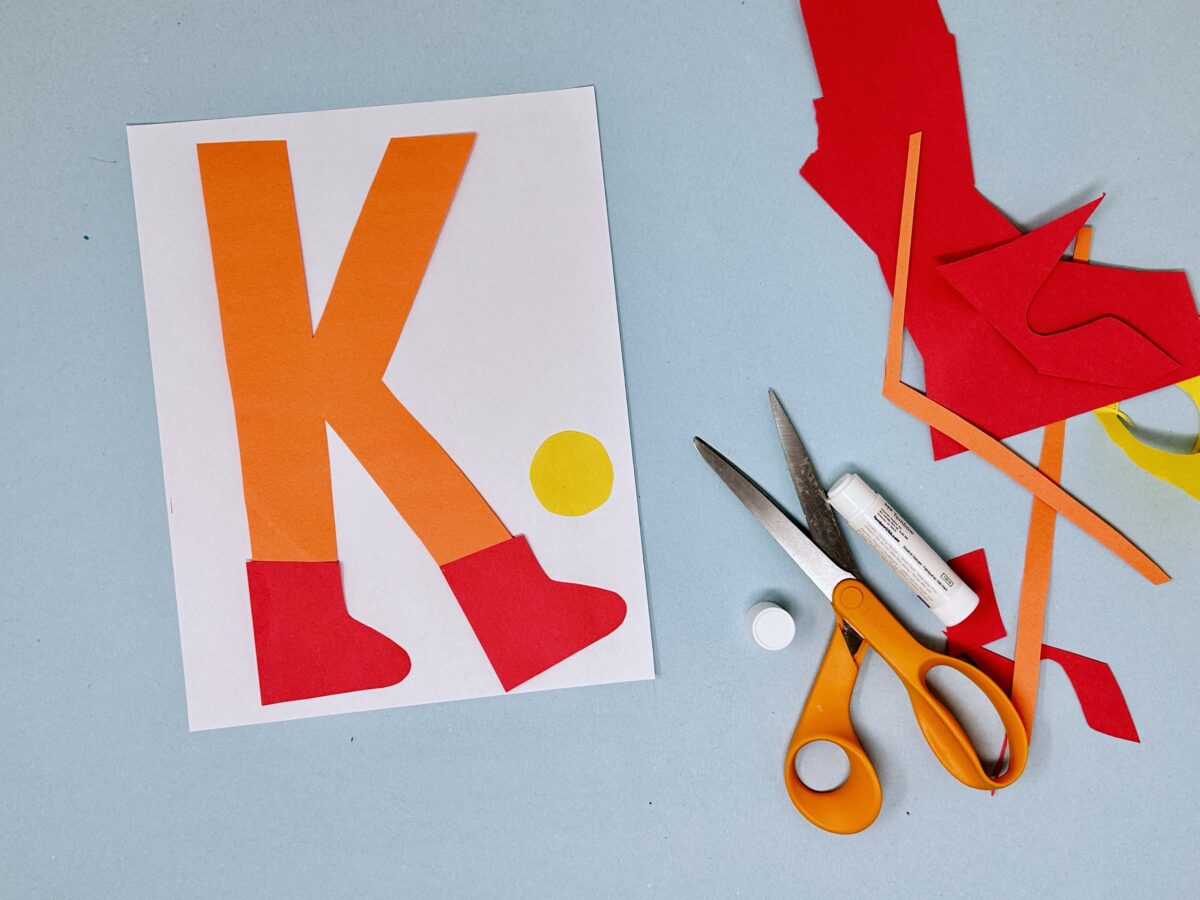
This letter K craft is a cinch to create and takes just a few sheets of paper.
Required Materials
- construction paper
- scissors
- glue
How To
Trace the outline of the letter K onto a piece of construction paper. Cut out the letter K. Then, use another color of construction paper to cut out two little booties or shoes for your letter K. Work with your child to glue the K and its shoes onto another sheet of paper. Finally, cut out or draw in a circle to act as a ball for your K to kick.
As an added challenge, ask your child to try writing the word kick at the top of the K is for Kick craft.
10. K is for Flying Kite
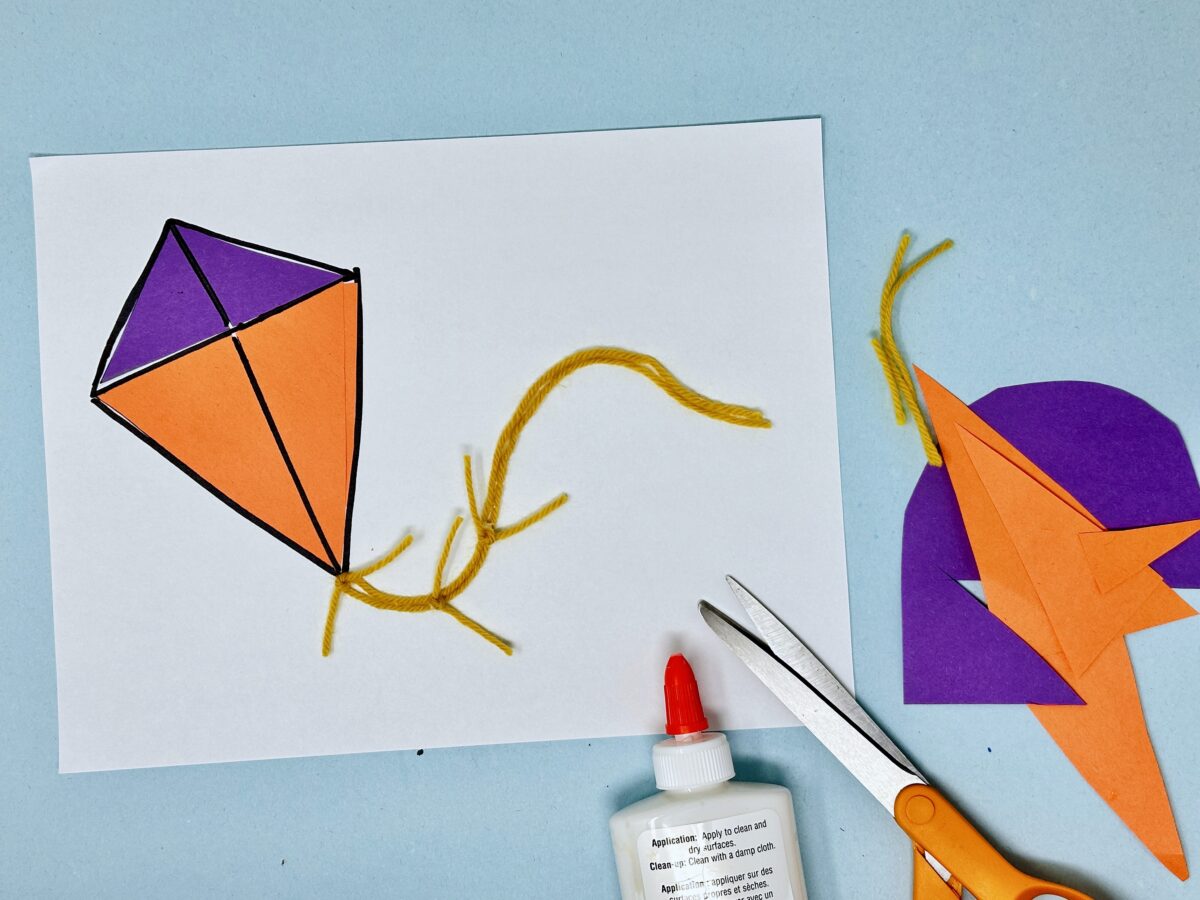
Make your very own kite with yarn, construction paper, and glue.
Required Materials
- paper
- construction paper
- scissors
- glue
- yard
How To
Start by drawing the shape of a diamond onto a sheet of paper. Divide it into quarters, creating two smaller triangles at the top and two larger triangles at the bottom. Then, cut out four triangles from the construction paper to fill in the triangles (you can also just invite your child to color in the triangles).
Next, have your child snip a medium-sized piece of yarn and few smaller pieces of yarn. Have your child fold the yarn in half, then tie the smaller pieces of yarn onto the larger piece, creating small knots and tails along the string to mimic the tail of a kite. Glue down the yarn.
Tip: This activity provides a great opportunity to begin exploring shapes, such as diamonds and triangles.
More Letter K Fun
Delight your child with more fun ways to explore the letter K, including:
The ideas, pictures, and copy for this post were provided by Smitha Katti from smilingcolors.com
-
Letter N Crafts and Activities
Explore fun Letter N crafts and activities for preschoolers! From noodle necklaces to narwhals, these hands-on projects make learning the alphabet creative and engaging. Perfect for…
-
Letter M Crafts and Activities
Explore fun and engaging Letter M crafts and activities for preschoolers! From mustaches to moons, find creative, hands-on ideas that help kids learn the letter M…
-
Letter L Crafts and Activities
Explore fun and creative letter L crafts and activities for preschoolers! From leaf art and lavender painting to lollipop crafts and lion masks, each idea uses…
-
Letter K Crafts and Activities
Engage preschoolers with fun, easy-to-make Letter K crafts and activities. From kings and kites to kangaroos and koalas, each project fosters creativity and learning using simple…
-
Letter J Crafts and Activities
Engage preschoolers with creative and educational Letter J crafts and activities! From jaguars and jellyfish to dot painting and salt art, these fun projects make learning…
-
Letter I Crafts and Activities
Explore fun, hands-on letter I crafts and activities for preschoolers! From igloo stamping to ice painting, these creative ideas teach letter recognition and sounds through engaging…


