Letter R Crafts & Activities for Preschoolers
Share
Hands-on crafts and activities focused on the letter R add even more fun to letter learning!
Table of Contents
Bring the alphabet to life with engaging hands-on activities focused on the letter R! These fun ideas use simple craft supplies and require minimal time, making them easy to fit into your schedule. Our letter R crafts and activities are perfect for preschoolers, but having an adult nearby to help ensure a smooth and enjoyable experience.
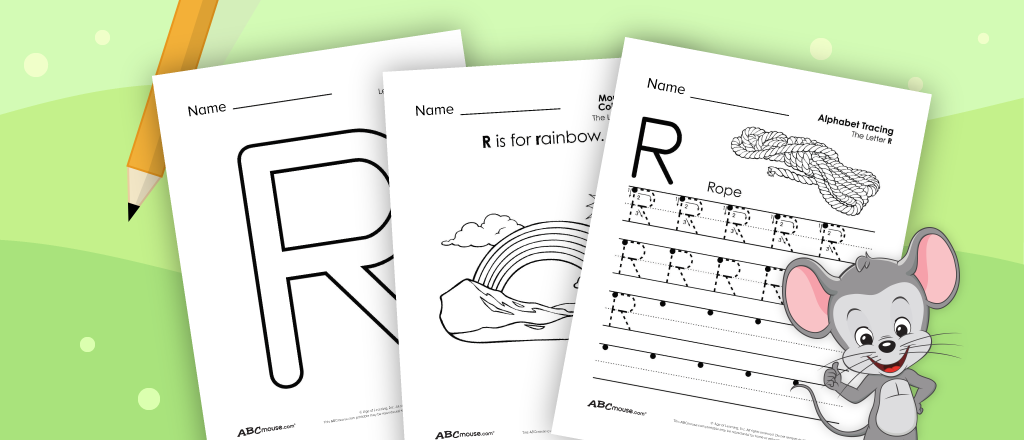
Several of the letter R crafts and activities listed below require the outline of a letter R. You can draw one yourself or find one in our free printable collection of letter R worksheets.
1. R is for Rocket
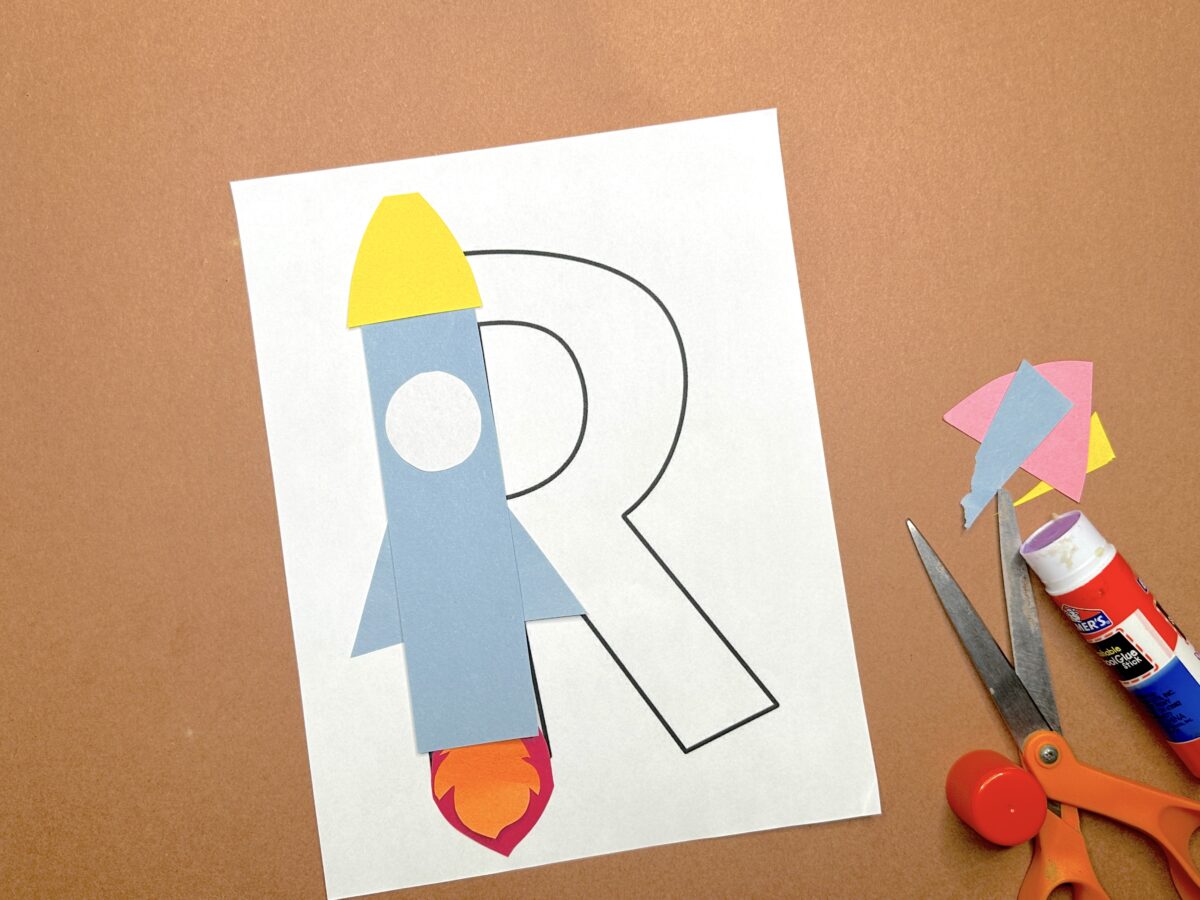
Get the letter R ready for blast off by dressing it up as a rocket. Try pairing this craft with our Space and Solar System Worksheets and Mazes.
Required Materials
- letter R template or outline
- construction paper
- scissors
- glue
How To
Print out or draw the outline of an uppercase letter R. Using scissors,
cut out a long rectangle for the rocket and glue it onto the straight side of the letter R. Next, cut out two smaller triangles and glue them to the sides of the rocket body, with the inner triangle following the lines of the letter R.
Then, cut out a flame shape from orange construction paper and layer it onto red construction paper and glue them below the rocket body. If it’s easier, you and your child can draw the flames in too. Finish the rocket by adding a yellow nose and white circular window.
2. R is for Road
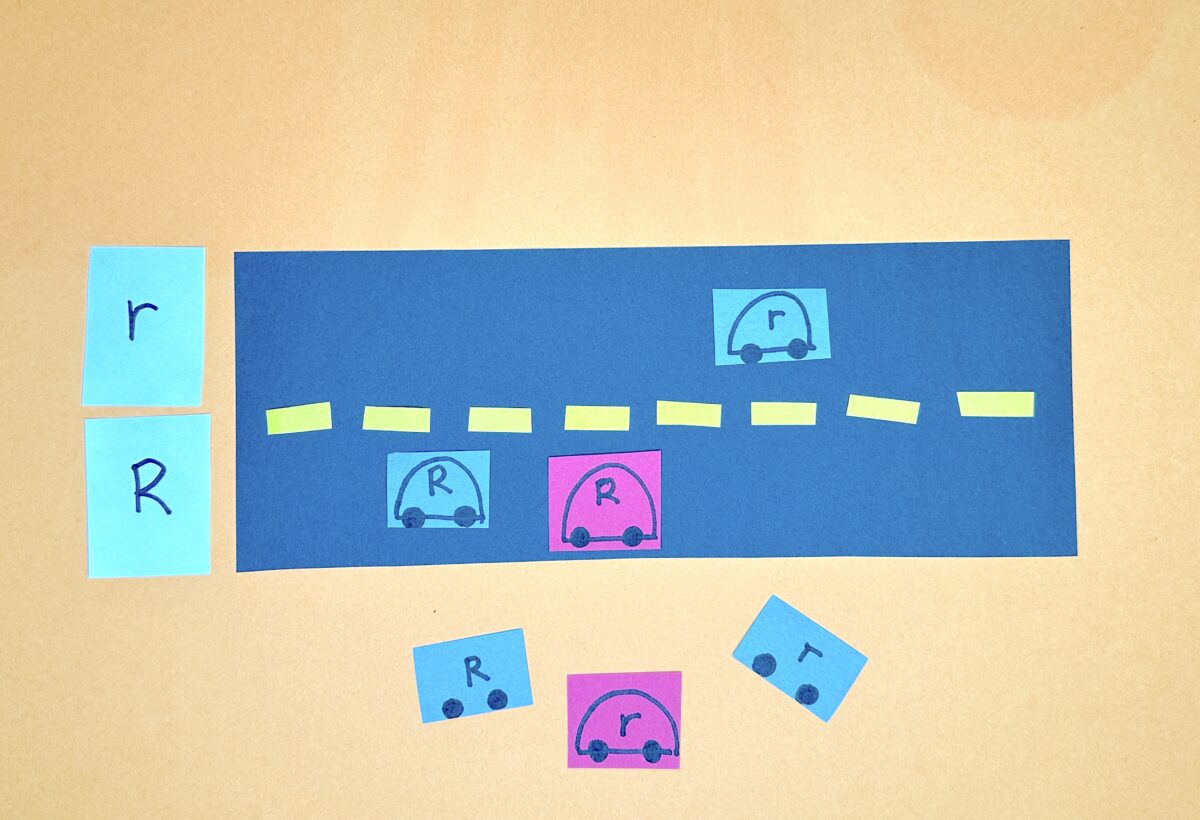
Get your engines revving with this fun race-inspired letter R activity!
Required Materials
- marker
- black and yellow construction paper
- small squares of paper
- glue
How To
Cut a sheet of black construction paper in half to create the “road.” Using a pair of scissors, trim small rectangles from a sheet of yellow construction paper and glue them down the middle of the road to form a divider.
Then, cut small rectangles or squares from different colored papers. Draw one uppercase and one lowercase letter R onto a square of paper and place them at the start of each side of the road. Draw a simple car shape onto each of the remaining squares of paper and an uppercase or lower case letter R.
Now it’s time for the fun to start. Invite your child to “drive” the cars into the correct lanes, steering those with lowercase Rs into one lane and those with uppercase Rs into the other lane.
3. R is for Rabbit
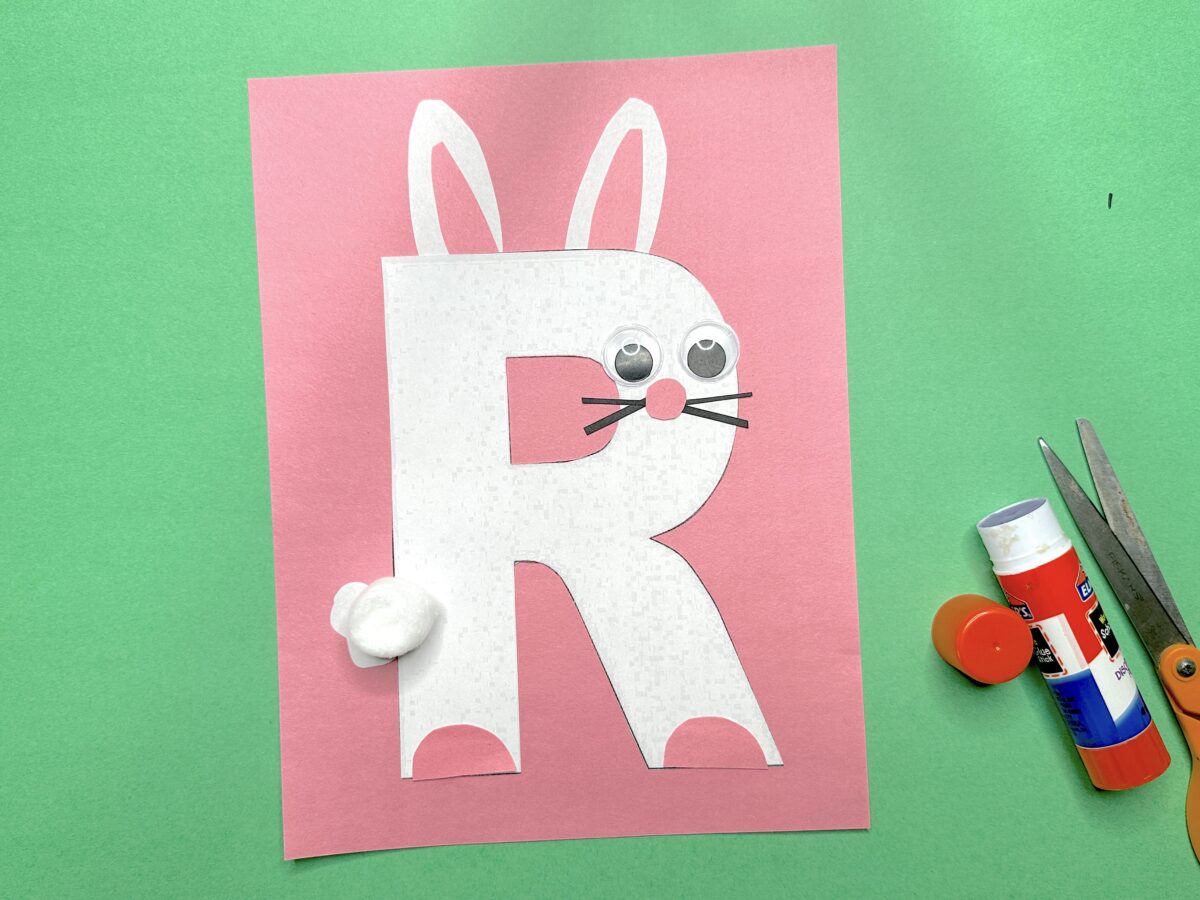
Create a resourceful little rabbit with just a few simple craft supplies.
Required Materials
- letter R outline
- white, black, and pink construction paper
- googly eyes
- cotton balls
- scissors
- glue
How To
Draw or print out the outline of an uppercase letter R onto white paper and cut it out. Then cut out two long ears from pink and white construction paper, with the white slightly wider and longer than the pink. Lay the pink on top of the white and glue them to the top of the letter R, forming rabbit ears.
Next, create a fluffy white tail by gluing down a cotton ball to the lower back side of the R. Create the feet of the rabbit by cutting two semi-circle shapes from pink construction paper and gluing them to the bottom of the R. Finally, glue on googly eyes and create whiskers with black construction paper, string, pipe cleaners, or a marker.
Tip: Have even more fun with rabbits with our free printable Bunny Rabbit Coloring Pages.
4. R is for River
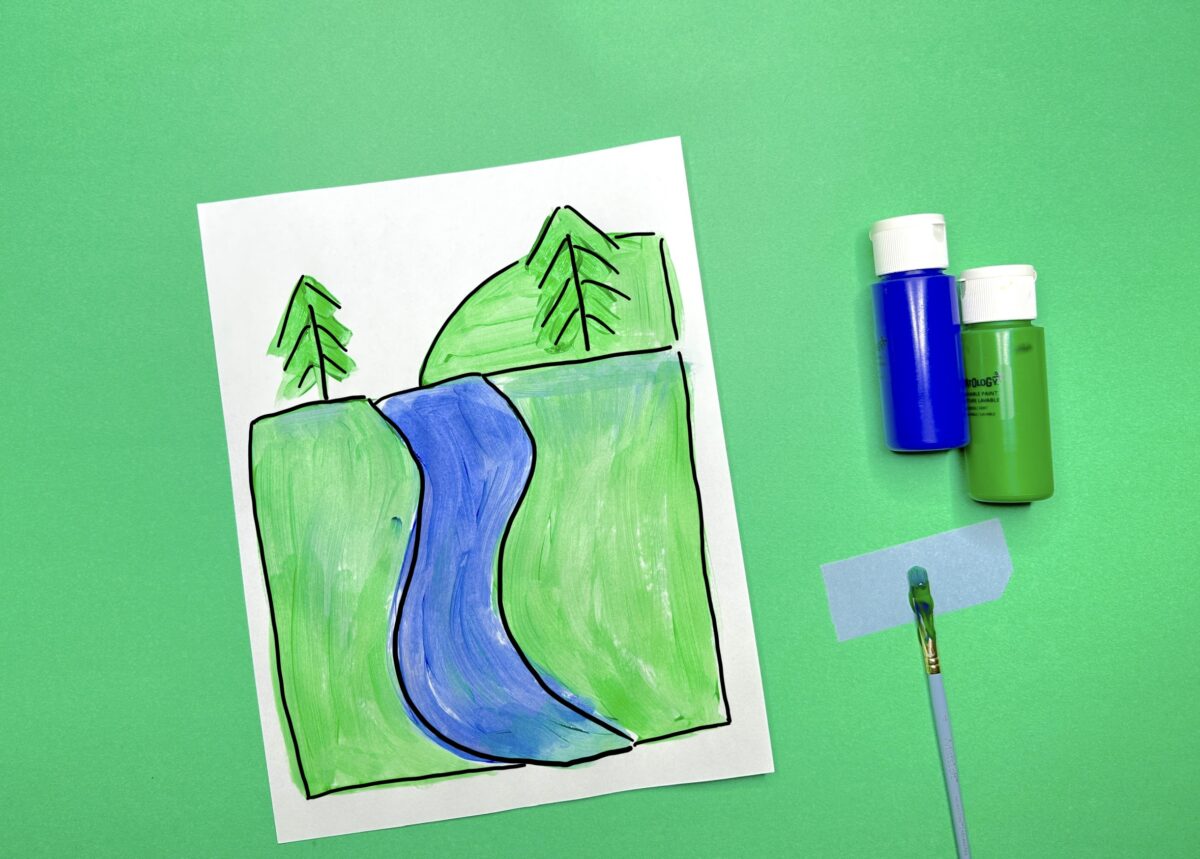
Keep exploring the letter R by creating a peaceful or rapidly-flowing river near big rolling hills. Add in some rocks and robins for an R-inspired landscape scene!
Required Materials
- paper
- marker
- paint
- paint brush
How To
Have your child begin by drawing the outline of rolling hills and a river. They can draw in other letter R items, like rocks, robins, a road, rainbow or raft, or anything else they’d like to include in their nature scene.
Then have them add color to their drawing, using paint to fill in the river, rolling hills, and any other items they’ve added.
Tip: As an added challenge, ask your child to draw in some letter Rs floating down the river.
5. R is for Rain
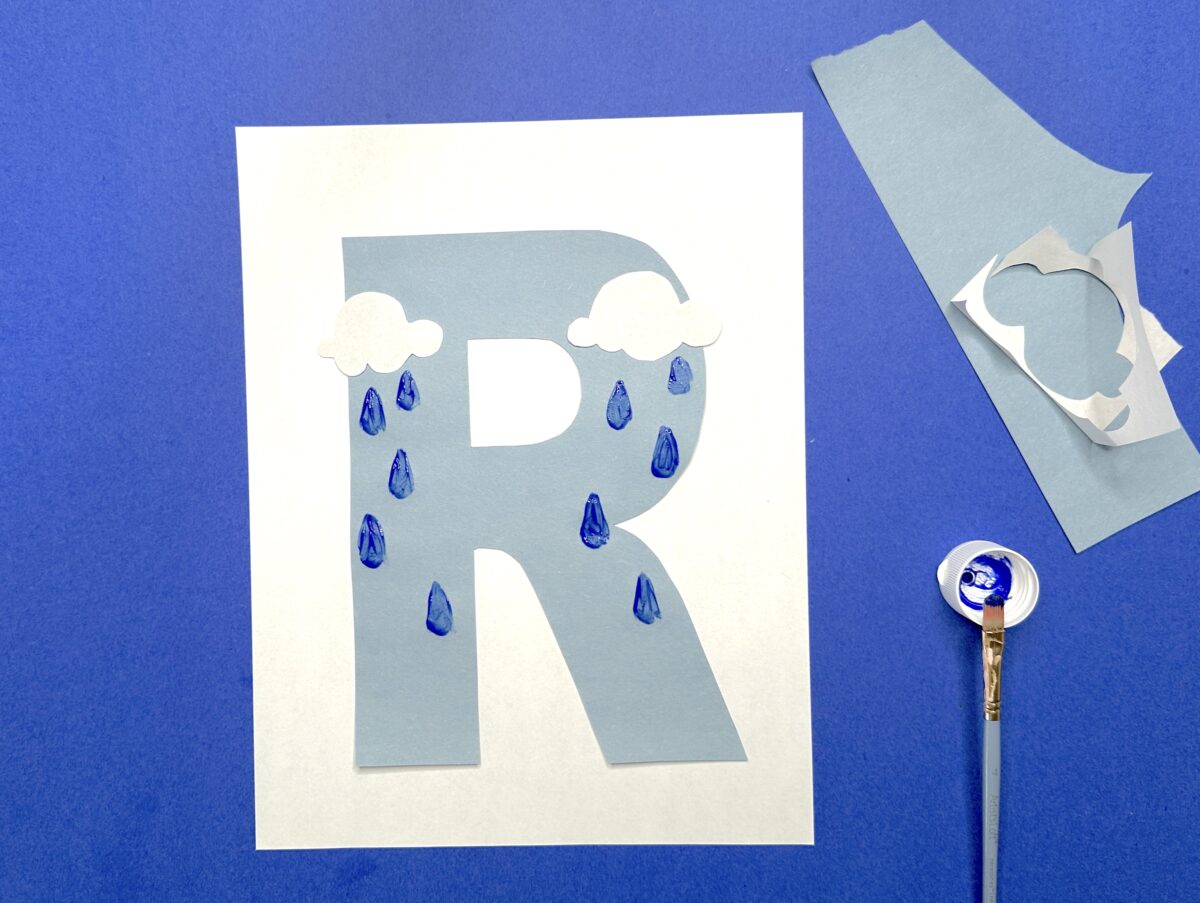
Make a letter R that represents a rain storm!
Required Materials
- light blue or gray construction paper
- white paper
- blue paint
- paint brush
- glue
How To
Cut out an uppercase letter R from blue construction paper. Then, have your child cut cloud shapes from white construction paper and
glue them down towards the top of the R. Finally, have your child use the blue paint to create raindrop shapes falling from the clouds.
Tip: Add texture and dimension to this project by creating clouds with cotton balls or mini marshmallows.
6. R is for Red
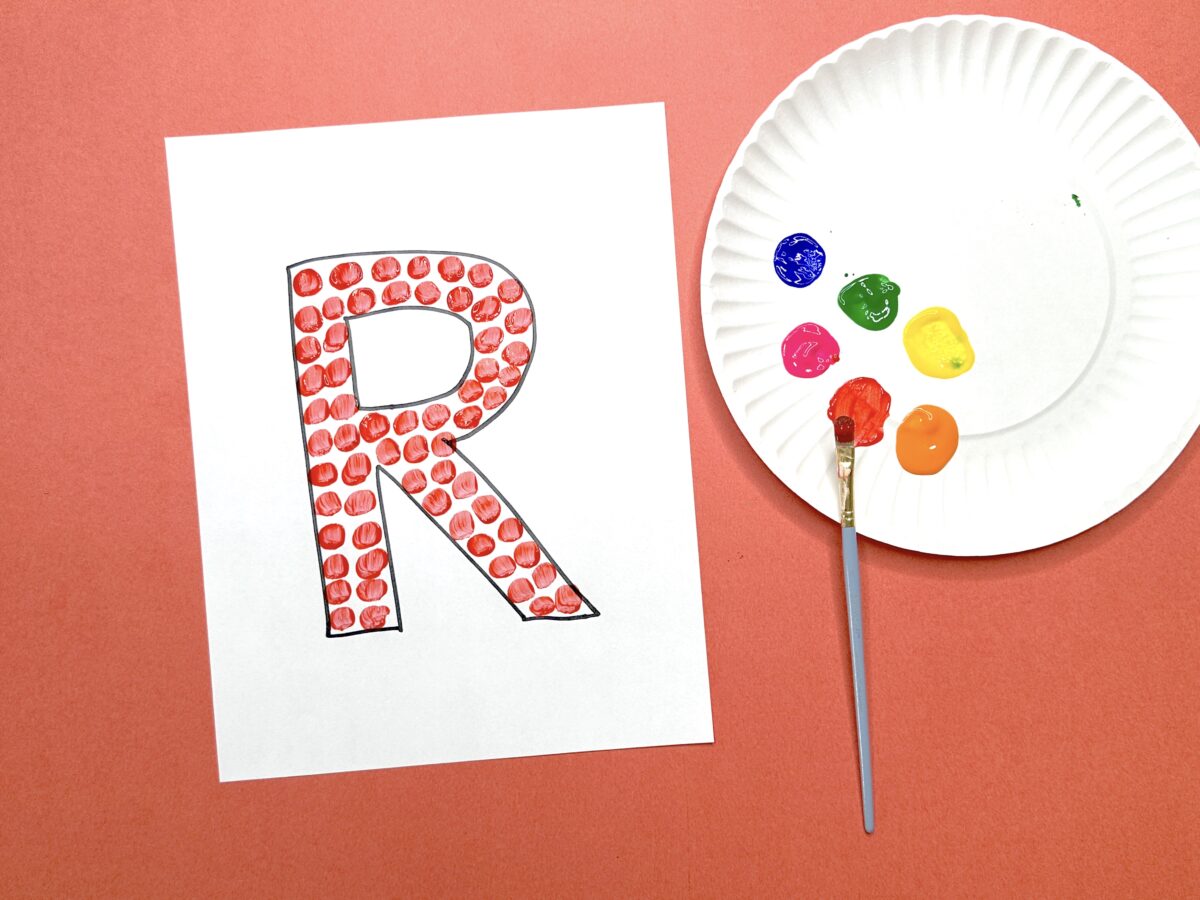
Create an R that’s really red by filling it with round circles!
Required Materials
- letter R outline
- red paint
- paint brush
- paper plate
How To
Draw or print out the outline of the letter R onto a sheet of white paper. Invite your child to fill the R with round dots using red paint. They could also fill their letter R with red markers, crayons, play dough, stickers, etc to complete this letter R activity.
7. R is for Rice
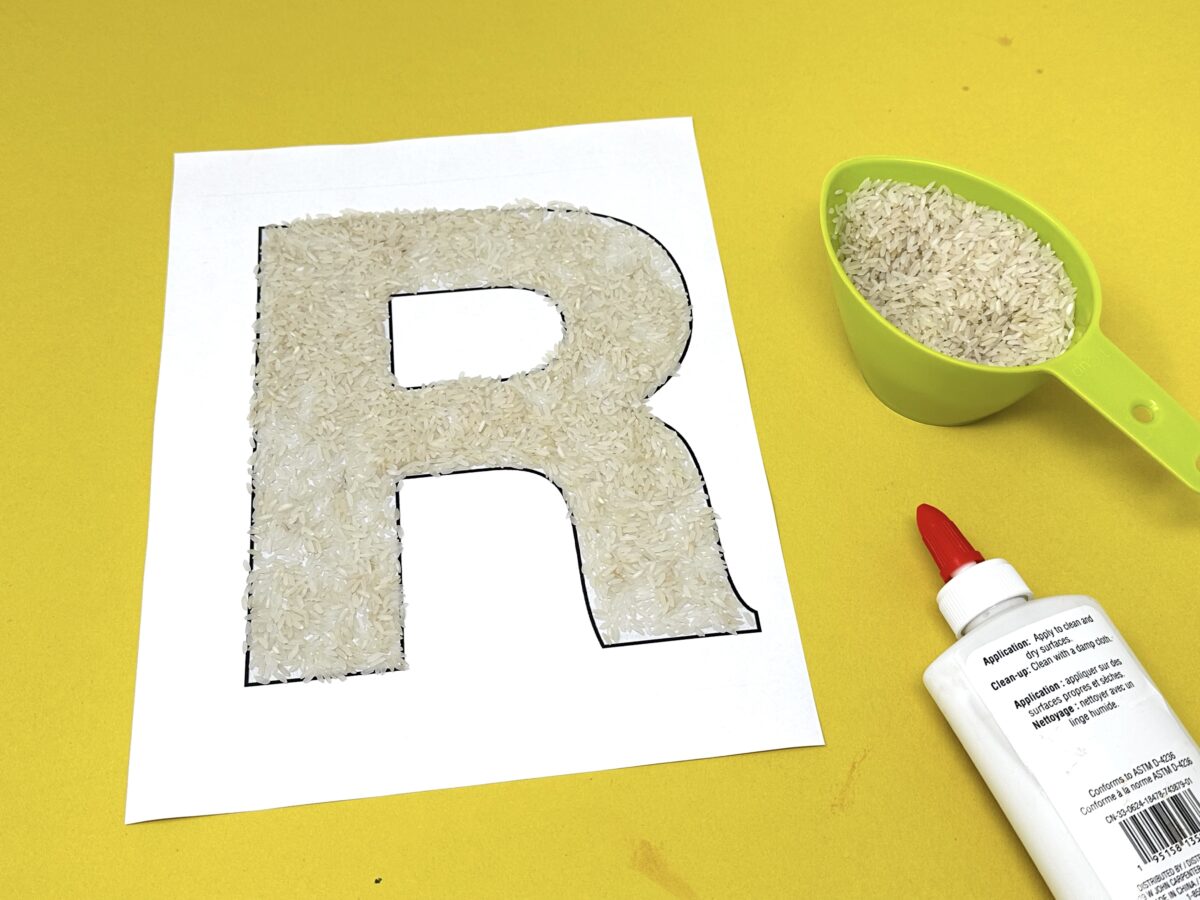
Here’s a radical and resourceful way to fill in the letter R – use old rice to cover every inch of it!
Required Materials
- letter R outline
- uncooked rice
- liquid glue
- paint brush or cotton swab
- rimmed baking sheet
How To
Print out or draw the outline of the letter R and gather a cup of rice, liquid glue, and a rimmed baking sheet. Set the letter R outline into the baking sheet. This will help contain loose grains of rice as your child works.
Fill the letter R with liquid glue, using a paint brush or cotton swab to help spread it out if needed. Then have your child use their fingers or a plastic spoon to scatter the rice onto the letter R, filling it in as mush as possible. Allow it to dry completely, then shake off any excess rice.
Tip: Add a pop of color to this project by painting over the rice once it’s dried.
8. R is for Rose
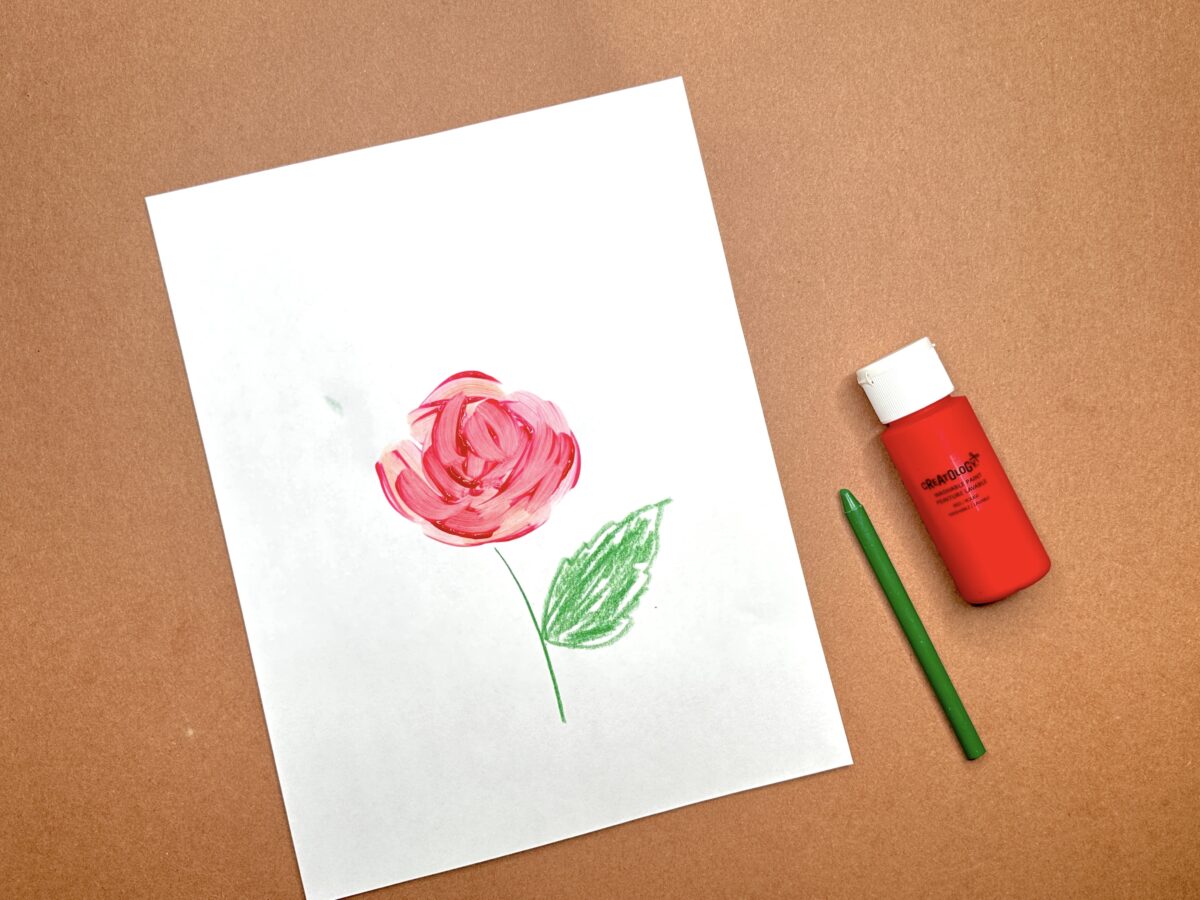
With just a few simple rounded strokes, your child can create their very own red rose.
Required Materials
- paper
- paint
- colored pencil or crayons
- paint brush or cotton swab
How To
Painting a rose is easier than you and your child may think! Set your space up with a sheet of plain paper and whatever color paint your child would like to use for their rose. You’ll also need a paint brush and a cotton swab.
You’ll create the shape of a rose by dipping your paint brush or cotton swab into the paint and creating small rounded arcs with it that overlap around each other (mimicking petals) and form a circular shape. Invite your child to experiment with the paint brush and cotton swab to decide which tool they enjoy working with more. Once the rose has dried, draw (or paint) in a leaf and stalk to complete it!
Tip: Keep it simple by coloring in our Rose Coloring Pages instead!
9. R is for Ring
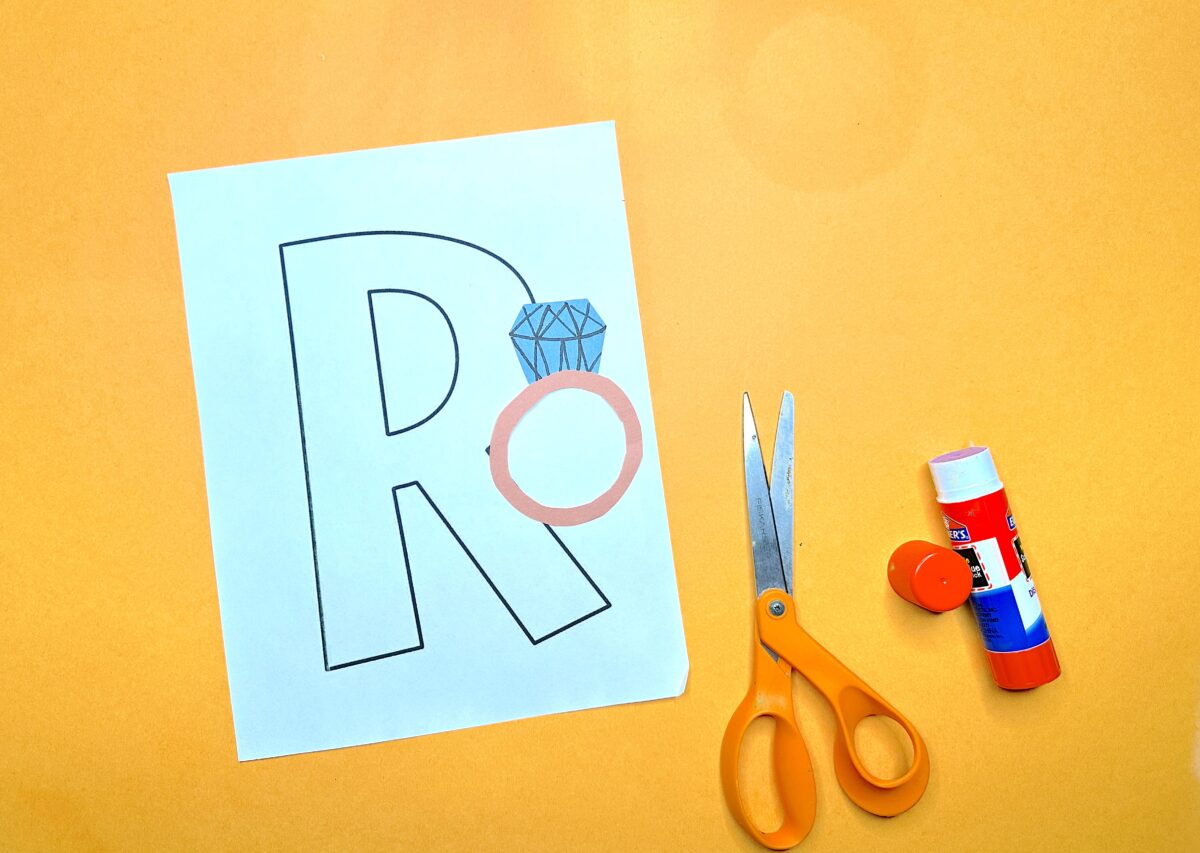
The letter R gets a radiant ring in this letter R craft. Use red paper or paint to create a ruby ring!
Required Materials
- letter R outline
- construction paper
- pencil
- scissors
- glue
How To
Draw or print out the outline of the letter R. Then, work with your child to create the round ring shape. Start by drawing a larger circle with a smaller circle inside of it. Then cut out the circle, creating the first part of the ring.
Next, decide what kind of ring your child would like to create (ruby, emerald, diamond, etc). Draw the shape onto a piece of construction paper to cut out and glue onto your ring or use crayons or markers to draw it in on top of the round ring.
10. R is for Rock Counting
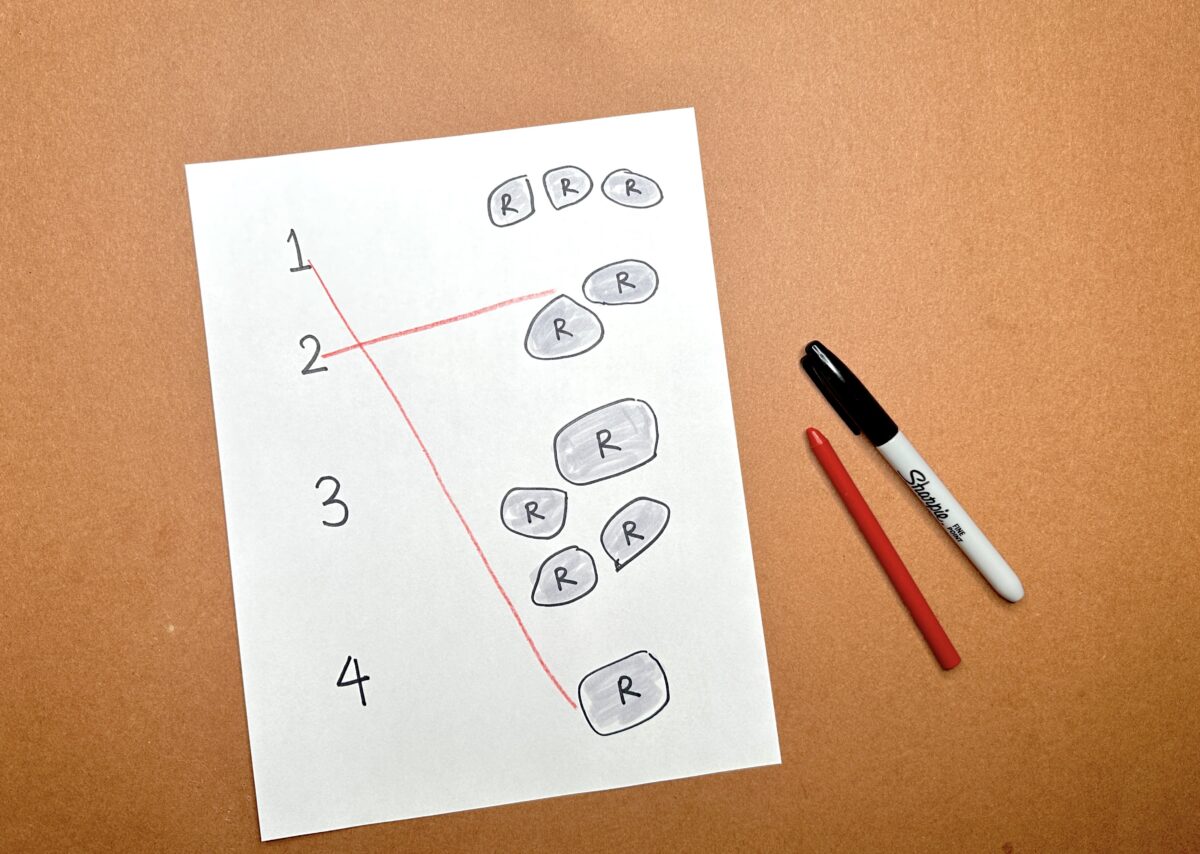
Add some number and counting practice to letter R learning with this rock counting activity. Will your rocks be rough and ragged or round and smooth?
Required Materials
- paper
- marker
- colored pencil or crayon
How To
Write the numbers 1 to 4 in the first half of a white sheet of paper. Draw rock outlines in groups of numbers between 1 and 4 on the other half of the paper. Then, ask your child to match each number they see with the correct amount of rocks.
More Letter R Fun
Delight your child with more fun ways to explore the letter R, including:
The ideas, pictures, and copy for this post were provided by Smitha Katti from smilingcolors.com
-
Letter N Crafts and Activities
Explore fun Letter N crafts and activities for preschoolers! From noodle necklaces to narwhals, these hands-on projects make learning the alphabet creative and engaging. Perfect for…
-
Letter M Crafts and Activities
Explore fun and engaging Letter M crafts and activities for preschoolers! From mustaches to moons, find creative, hands-on ideas that help kids learn the letter M…
-
Letter L Crafts and Activities
Explore fun and creative letter L crafts and activities for preschoolers! From leaf art and lavender painting to lollipop crafts and lion masks, each idea uses…
-
Letter K Crafts and Activities
Engage preschoolers with fun, easy-to-make Letter K crafts and activities. From kings and kites to kangaroos and koalas, each project fosters creativity and learning using simple…
-
Letter J Crafts and Activities
Engage preschoolers with creative and educational Letter J crafts and activities! From jaguars and jellyfish to dot painting and salt art, these fun projects make learning…
-
Letter I Crafts and Activities
Explore fun, hands-on letter I crafts and activities for preschoolers! From igloo stamping to ice painting, these creative ideas teach letter recognition and sounds through engaging…


